

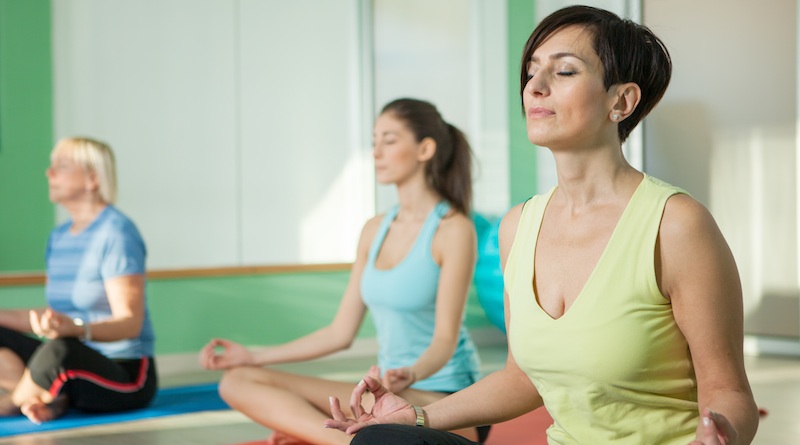

For the 2022 World Asthma Day, ‘Closing Gaps in Asthma Care’ is the theme. The day is set aside to raise awareness about asthma and how those battling the condition can best equip themselves.
Health condition, caused by constriction of the airways of the lungs, causes tightness in the chest, bouts of coughing, wheezing and breathing difficulties. Inflammation of the air passages can become chronic. Asthma is caused by allergies or stress. Yoga has come a long way to heal and manage asthma.
Check out the Ten Yoga Asanas for Asthma

- Sit keeping your spine erect and your knees bent. Position the blocks on their broadsides on either side of your hips. Then place your palms on the blocks. Sit on your buttock bones.
- Straighten each leg, one at a time, and join the inner sides of your legs and feet. Lengthen the calf muscles, and stretch your knees and toes. Keep your knees straight. Press your palms down on the blocks and stretch your elbows and arms.
- Lift your abdomen, freeing the diaphragm of tension. Hold the pose for 1 minute. Beginners may find it easier to separate their feet slightly and should hold the pose for just 30 seconds.
Benefits
|
|
Added Benefits
|


-
Sit against a wall. Then sit in Dandasana with your shoulders and back touching the wall. Keep your back erect. Sit on your buttock bones. Place your palms on the floor, beside your hips, fingers pointing forward. Look straight ahead.
-
Press your palms down on the floor to push your torso upward. Exhale, and spread your legs as far apart as possible. Use your hands, one by one, to help you push your legs even further out to the sides.
-
Move your hands behind your buttocks, and place both palms on the floor. Press your heels and highs down on the floor. Lift your waist and the sides of your torso. Rotate your thighs to the front so that the kneecaps face the ceiling.
-
Shift your weight from the buttocks to the pelvic bone. Stretch each leg from thigh to heel. Hold the pose for 30 – 40 seconds.
Other Benefits
|

-
Place 2 bolsters parallel to each other on the floor. Kneel on the bolsters, keeping your knees together. Place the rolled blanket on your shins, and the folded blanket under your buttocks. Sit with your back upright.
-
Keep your chest stretched out. Imagine you are squeezing your kidneys and drawing them into the body. Place your palms on your knees. Look straight ahead. Stay in the pose for 30 – 60 seconds.
Added Benefits of Virasana - Reduces stiffness in the hip joints.
- Reduces inflammation in the blood vessels of the legs caused by standing for long periods.
- Alleviates pain or inflammation in the knees and tones knee cartilage
- Relieves gout and rheumatic pain
- Tones the hamstring muscles
- Strengthens the arches of the feet, and relieves pain in the calves, ankles, and heels
- Helps to correct calcaneal spurs and flat feet

-

-
Bring the belt down to below your waist. Pass it under both feet to stretch it over your ankles and the insides of the thighs. Move your feet closer to your groin. The belt should feel neither too tight nor too slack, so adjust the buckle accordingly. Make sure that the end of the bolster touches your buttocks. Position a block under each thigh.
-
Place your elbows on the floor, and lower your head and back onto the bolster. Make sure that the bolster comfortably supports the length of your back and your head. Your spine should be in the center of the bolster.
-
Stretch your arms out to the sides, with the palms facing the ceiling. Relax, and extend your groin out to the sides. Feel the expansion of the pelvis, and the release of tension in your ankles and knees.
-
Initially, With practice, increase the duration to 5 – 10 minutes.

Added Benefits of Supta Baddhakonasana |
- Regulates blood pressure
- Prevents hernia as the hips and groin become more supple
- Relieves varicose veins and sciatica
- Reduces the pain caused by haemorrhoids
- Relives indigestion and flatulence
- Tones the kidneys
- Improves blood circulation in the ovarian region, and is particularly beneficial during puberty and menopause
- Alleviates menstrual pain and leukorrhoea
- Corrects a prolapsed uterus

-
Kneel in Virasana and place a bolster behind you, the short end touching your buttocks. Keep a rolled blanket on the far end. Make sure that the inner sides of your feet touch your hips. Keep your back straight. Place your fingers on the floor beside your toes.
-
Press your palms on the floor, bend both elbows, and lean back toward the bolster. Place your elbows and forearms, one at a time, on the floor. Gradually lower your back onto the bolster. To avoid strain in the pelvic area or the thighs, ensure that your knees remain firmly on the floor.
-
Once you lower your back onto the bolster, rest the back of your head on the rolled blanket. Keep your chest fully expanded.
-
Press your shoulder blades down on the bolster to lift your chest. Extend your toes and ankles toward the bolster. Push your feet closer to your hips with your hands. Extend the pelvis, and press your thighs to close together.
-
Move your arms out to the sides, with the palms facing upward. Extend your neck, but keep your throat relaxed.
-
Drop your eyelids down gently. Experience the relaxation of the thighs and the abdomen, and the lift of the chest. Feel the continuous stretch from the cervical spine to the tailbone. Initially, stay in the pose for 1 minute. With practice, increase the duration to 5 – 10 minutes.
Added Benefits of Supta Virasana
|

-

-
Exhale, and lower your back toward the bolster. Press each palm down on the floor on either side of the bolster, your fingers pointing forward. Both arms should support your upper back.
-
Keep your thighs, knees, and feet close together your heels on the bench, and your toes pointing upward. Lower your arms to the floor.
-
Slide further down, until the back of your head and your shoulders rest on the bolster. Straighten your legs, keeping your feet together. Stretch the heels and toes away from the torso to increase the stretch of the legs.
-
Extend your arms to the sides on the floor, with the palms facing the ceiling. Hold the pose for 3 minutes. Gradually increase the time to 5 – 8 minutes.

Added Benefits of Setubandha Sarvangasana
|

-
Start with Tadasana facing a wall, about 1m (3.5 ft) away from it. Place 2 of the blocks on their broadsides, shoulder-width apart, against the wall. Place the third block on its long side, 45cm (18in) away from the wall. Separate your feet to a distance of 45cm(18in). Kneel, and place your palms on the two blocks against the wall.
-
Press your palms down on the blocks and walk your feet back, until they are 1.2m (4ft) away from your hands. Make sure that your feet are in line with your hands and the same distance apart. Raise both heels, stretch your legs, then lower your heels to the floor. Stretch your arms fully.
-
Consciously stretch each leg from heel to buttock, and from the front of the ankle to the top of the thigh. Raise your buttocks, stretch your chest, and push your sternum toward your hands. Exhale, then rest your head on the third block.
-
Press your hands down on the blocks, extending your arms fully. Stretch your spine and expand your chest. Keep your throat soft and elongated. Relax your eyes and keep your brain passive.
Benefits
|

-

-
Inhale and raise your arms toward the ceiling, your palms facing forward. Push your spine up.
-
Bend from the waist toward the floor. To increase the stretch of your spine, vital for correct practice, press your heels down on the floor.
-
Rest the crown of your head on the blocks in front of you, and place your palms on the blocks beside your feet. Pull in your kneecaps.
-
Extend your hamstrings and pull your inner legs upward. Feel one single stretch from the crown of your head to your heels. Hold the pose for 1 minute.

Benefits
|
-
Stand in your bare feet on a smooth and even surface. Keep your feet together, with your heels touching the wall. Beginners may find it easier to keep their feet 5 cm (2in) apart.
-
Stretch your arms along your sides, with the palms facing your thighs, and your fingers pointing to the floor. Stretch your neck upward, keeping the muscles soft and passive.
-
Distribute your weight evenly on the inner and outer edges of your feet, and on your toes and heels.
-
Tighten your kneecaps and open the back of each knee. Turn in the front of your thighs. Tighten your buttocks. Pull in your lower abdomen, and lift your chest.
-
Keep your head erect and look straight ahead. Breathe evenly and with awareness. Experience your body and mind as an integrated whole and feel the surge of energy. Stay in the pose for 30 – 60 seconds.
|
Added Benefits of Tadasana Samasthithi
|