

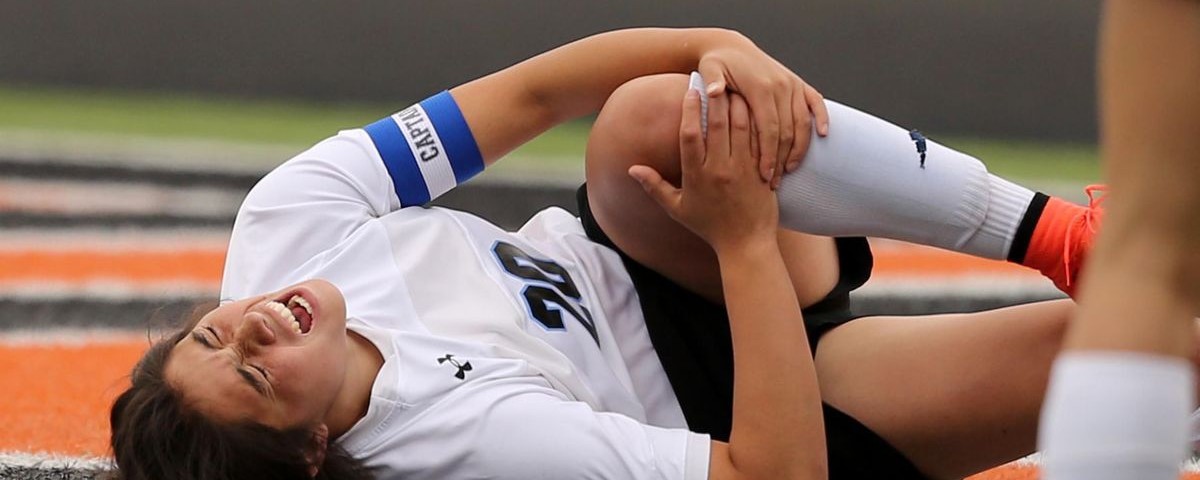

Soccer is a lopsided sport. Most of the players are 80% one leg dominant. So most of the time they are kicking with one leg and planting with the other. They use their hip flexor and quads on one leg and a lot of glutes and hamstring on the planting leg. This causes many issues with both the hip and the spine.
The following yoga postures will improve flexibility of all the leg muscles, especially the hip flexors and hamstrings:
1. Adho Mukha Svanasana (Downward Dog pose)
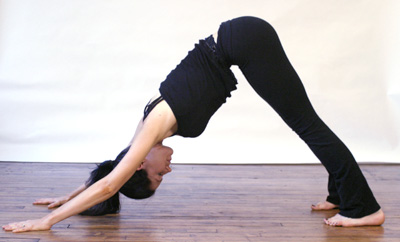

- Begin on your hands and knees. Your wrists should be underneath your shoulders, and your knees underneath your hips.
- Inhale as you tuck your toes under your heels. Then exhale to lift your hips, coming into an upside down “V” shape called Downward Facing Dog.
- Spread your fingers wide and create a straight line between your middle fingers and elbows. Work on straightening your legs and lowering your heels toward the ground. Your heels should be slightly wider than your toes, so the outside edges of your feet are parallel with the outside edges of your mat. Relax your head between your arms, and direct your gaze through your legs or up toward your belly button. Work on holding for five breaths.
2. Anjaneyasana (High Lunge)
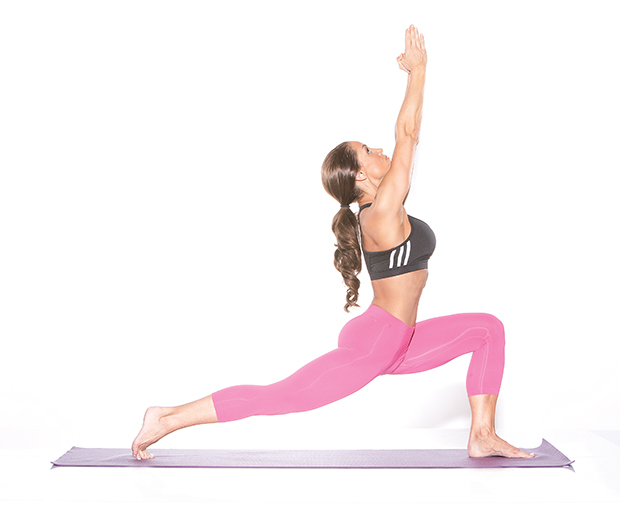

- Start in Downward Facing Dog Pose (Adho Mukha Svanasana). On an exhalation, step your right foot forward and place it beside your right thumb, lining up your right knee over your right ankle. Lower your left knee to the floor, ensuring to place it behind your hips.
- On an inhalation, raise your torso and sweep your arms above your head with your palms facing one another, placing your biceps beside your ears. On your next exhale, allow your hips to settle forwards and down until you feel a stretch in the front of your left leg and pose.
- Draw your tailbone done towards the earth, lengthening your lower back and engaging your core muscles. Begin to draw your thumbs into the back plane of your body as you reach up with your heart, and shift your gaze up for a mild backbend.
- Stay here, or raise your back knee off the mat for a full Crescent Lunge.
- To exit the pose, place your hands down on the mat and step back to Downward Facing Dog Pose (Adho Mukha Svanasana). Repeat with the left leg forwards.
3. Virabhadra (Warrior Pose)

- Stand in mountain pose continuing with your smooth flowing breath. Jump your feet sides ways and sweep your arms out to the side so your ankles are below your wrists. Establish your foundation, by pulling your knees and thighs up, tucking your tailbone under, pushing your feet firmly into the floor. Visualize an imaginary line running vertically down the centre of your body, dropping your shoulders. Squeeze your arms and legs away from the centerline. Keep an awareness of this line as you turn your right foot out to 90 degrees and turn your left foot in to 70 degrees.
- Ensure the heel of your front foot aligns with arch of your back foot, hips facing forward. If your body wants to turn off centre, counter-act it by pushing simultaneously in opposite directions from the centre line.
- Inhale, an as you exhale bend your right leg, pulling up with the outside and inside of the thigh to form a right angle at the knee. Only go as low as you can with out turning your hips off centre. Ideally you want your knee directly above your ankle with you leg coming vertically out of the floor like pillar. Keep the power flowing through the back leg into the floor. Inhale lift the spine; exhale turn your head to look over your right arm.
- Take a few deep breaths through the nose. Hold the pose and breathe smooth. Reverse the procedure back to mountain pose and repeat back to the other side.

Hold each Lunge or Warrior pose with the dominant leg back, stretching the hip flexors for about 6 slow, steady breaths. (This should be equivalent to at least 30 seconds). When the dominant leg is forward, hold for about 3 breaths (at least 15 seconds). There are several variations that can enhance the the above poses. For example, High Lunge with a Twist: place the opposite elbow on the forward knee, palms together and open the heart toward the side of the forward leg. Such variations provide multi-planar motion, critical for pivoting/cutting sports like soccer.
4. Virasana (Hero Pose)

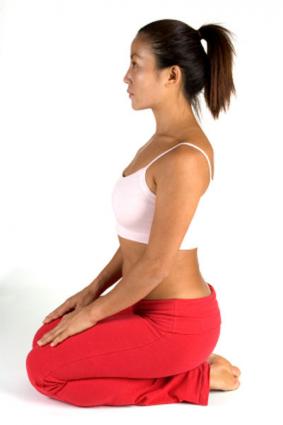
- Perform this pose by kneeling on the floor with the knees close together and the feet apart, slightly wider than the hips.
- Point the big toe of each foot inward and keep the top of your feet flat on the floor. Lean back and sit on the floor between your feet. Lean your torso slightly forward.
- Place your hands on your lap with the palms up. Straighten the spine by pressing the shoulder blades together while lifting the chest upward.
- Hold this position for up to one minute. Practice this pose until you can hold it for up to five minutes.
5. Trikonasana (Triangle Pose)


- Stand up straight and step forward with the right leg until your feet are about 4 feet apart.
- Raise your arms and extend them out to each side of the body. Turn the right foot in 45-degrees and turn the left foot out 90-degrees.
- Exhale and turn your torso toward the right. Breathe in.
- When you exhale, turn your body farther to the right. Reach down with the left hand and upward with your right hand.
- Place your left hand on the floor outside of your right foot and look upward toward the ceiling.
- Hold this pose for 30 seconds to one minute and then repeat on the other side.
6. Upavishta Konasana (Seated Straddle)

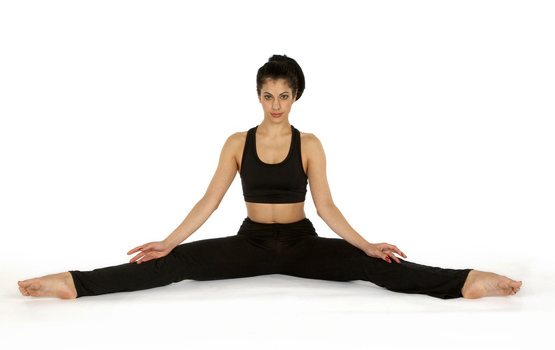
This is great stretch for the inner thigh muscles. Most athletes with tight hamstrings will need to sit on the edge of folded blankets or towels in order to keep the back strait.
- Sit down with your feet about 3-4 feet apart (not as wide as you can go). Reach back with your right hand and move the flesh of your right bum cheek away from you, and then do the same with your left. This will help your pelvis ground more firmly so you can stretch your hamstrings more effectively.
- Sit tall, reaching your head away from your hips, and draw your belly and ribs in. Make sure the toes and knee caps are pointing strait up toward the ceiling. Keep that length as you begin to fold forward at your waist, sliding your hands down your legs.
- Go down as far as you need to feel a stretch, but you don’t want to feel pain. Stay for at least 5 deep breaths.
7. Parighasana (Gate Pose)
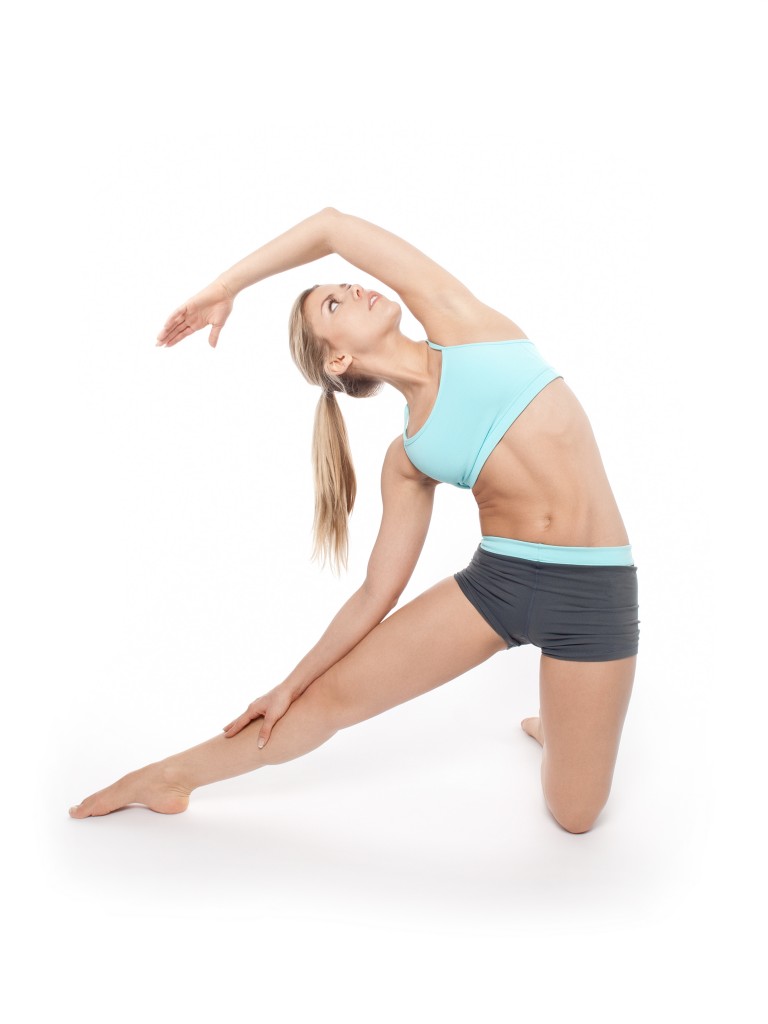

This is a good pose for the hamstrings and adductors of the extended leg and the quadratus lumborum on the kneeling side.
- Stand on your knees. If you are working on a hard floor, you might consider padding your knees with a mat or blanket. Stretch your right leg out to the right, with the heel of the foot on the floor and the toes stretching away from the body. Have the foot as flat on the floor as possible. Make sure the right leg is straight, with the knee facing the ceiling and the ankle in line with your right hip. Place the left knee directly below the left hip.
- Stretch both arms out to the sides, palms facing downward. In the front body, reach from your sternum through the chest muscles, lengthening along the biceps all the way into your thumbs. Be careful not to poke your rib cage forward. Feel the back body extend from the thoracic spine into the pinkies. Inhale and feel some lightness in the side body; exhale and bend at the waist, dropping the right palm down to the lower right leg and stretching the left arm up, palm facing downward.
- Each time you inhale, grow a little longer through the spine into the crown of your head, reaching into all the fingers of the left hand. With each exhalation gently deepen your side stretch, allowing the right hand to move down the right leg toward the ankle and the left palm to stretch away from the left hip.
- Instead of closing down the face and belly toward the floor, press your right thumb into the inner right leg to help you twist. Feel the right hip and the back right ribs move forward as the heart opens. Try not to have the left arm block your sight; rather stretch it past your ear and overhead. Breathe into the left rib cage, feeling the intercostal muscles expand. Know that you are also providing a nourishing stretch to the liver.
- When you feel ready to come out of Parighasana, use the inhalation to lift your left arm straight up toward the ceiling, draw your spine back to vertical, and reach your two arms horizontally once again. With the next exhalation let the arms drop. When you do the pose on your second side, you will not only stretch the right side body and intercostals, you will also provide an opening to the stomach and spleen.
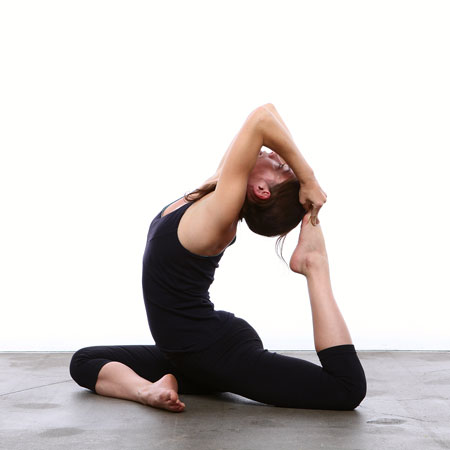
8. Supta Padangusthasana (Reclining Big Toe Pose)

- On an exhalation draw the right knee into your chest, fold a strap around the arch of the right foot and extend that right leg up to the ceiling, hold the strap with both hands, walk hands up along the strap till the arms are straight keeping shoulders pressing in the floor.
- Keep strongly extending through the left leg pressing the top of the left thigh down and extend through the right heel creating a comfortable stretch in the back of the leg.
- Stay here or turn the right leg out and bring the leg down to the floor on your right side, keeping the left hip grounded.
- Stay in both variation for about 1-3 minutes.
- Once back to centre, hold the leg up for another 30 sec.

9. Kapotasana (Pigeon Pose)

This posture stretches the outer hip of the front leg and the hip flexors of the back leg. Again, if the hip flexors and quads are tighter in the dominant leg, spend more time with that leg extended back.
- From Downward Facing Dog, step both feet together and bring your right knee forward between your hands, such that your outer right leg is resting on the mat.
- Drop your back leg to the ground. Keep the back leg turned under.
- Keeping your front leg bent, place it shin down on floor behind your right wrist.
- Align your right knee straight in front of your right hip and your right shin parallel to the front of your mat.
- Lower your hips, bringing your left knee to the floor and walk your left foot back a few inches to straighten your left leg directly behind your left hip. Rest the top of your left foot on the floor.
- Walk your fingertips out to 18 inches in front of your right shin and bring your elbows to the floor, forearms parallel to each other.
- Draw your right hip back, and your left hip forward
- Take quite a few breaths in Pigeon (3-7 breath) . Make sure your front foot is well flexed. You may feel this pose in your hips as they open up.
10. Purna Titli Asana (Reclined Butterfly)
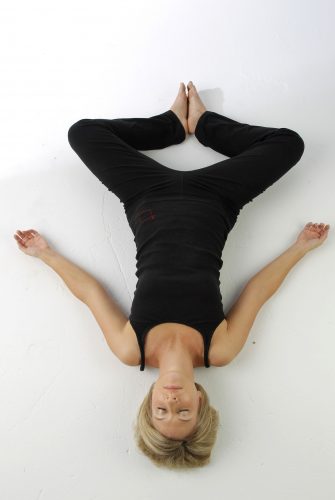

- Lying on your back, bend your knees at a 90-degree angle with your feet on the floor.
- Let your knees to open up and rotate outward as you touch the soles of your feet together.
- Relax your legs and allow them to fall open as far as they will naturally. Let gravity slowly pull your knees downward toward the floor.
- Breathe deeply and hold the position for as long as you comfortably can, working your way up to four to five minutes.
In addition to improving flexibility, yoga can also be restorative. Doing relaxed, supported postures is a great way to allow the body to recover from the intense workouts of both professional and recreational players. All yoga sessions for athlete should include at least one long, restorative posture. During peak training or competitive periods, a whole session of nothing but restorative yoga can help the body recover from workouts and to stay healthy and injury-free.
The greatest power and efficiency in any sport come when the body has a balance of strength and flexibility