


The spine consists of 26 bones, called vertebrae, which run from the “atlas” our head sits on, to our “coccyx” or tailbone. These vertebrae stack one on top of the other in the vertebral column, floating on intervertebral discs. Every other bone in our body is attached in some way to our spinal column. Further, the spine has 31 pairs of spinal nerves that exit at some point from the spinal column. These delicate spinal nerves can become irritated, or inflamed when our spine fails to function properly.
The most important aspect to be noted here. Should one or more of your vertebrae fail to move (hypomobility), other vertebrae would have to move more than they should (hypermobility) in order to compensate and still allow your body to perform the function it needs. When this happens, the muscles and ligaments connected to your spine can become fatigued and cause you pain. This abnormal movement of your vertebrae will also cause pressure and irritation to your spinal nerves. Should this abnormal movement continue over an extended period of time, more chronic ailments would develop. Your muscles, ligaments, vertebras, discs and organs attached to your spinal nerves would all be adversely affected. These deviations from normal often can be easily corrected with specific spinal manipulations and some helpful guidance on proper exercise.
| Pain is your body’s way of telling YOU there’s a problem. |
WF experts bring for you yoga asanas to maintain good spinal health.
Balasana (Child’s Pose)
- From Downward Facing Dog, drop the knees to the floor. Spread the knees as wide as the mat, keeping the big toes touching.
- Bring the belly to rest between the thighs and the forehead to the floor.
- There are two possible arm variations: Either stretch the arms in front of you with the palms toward the floor or bring the arms back alongside the thighs with the palms facing upwards. Do whichever feel more comfortable to you.
Bitilasana (Cow Pose)
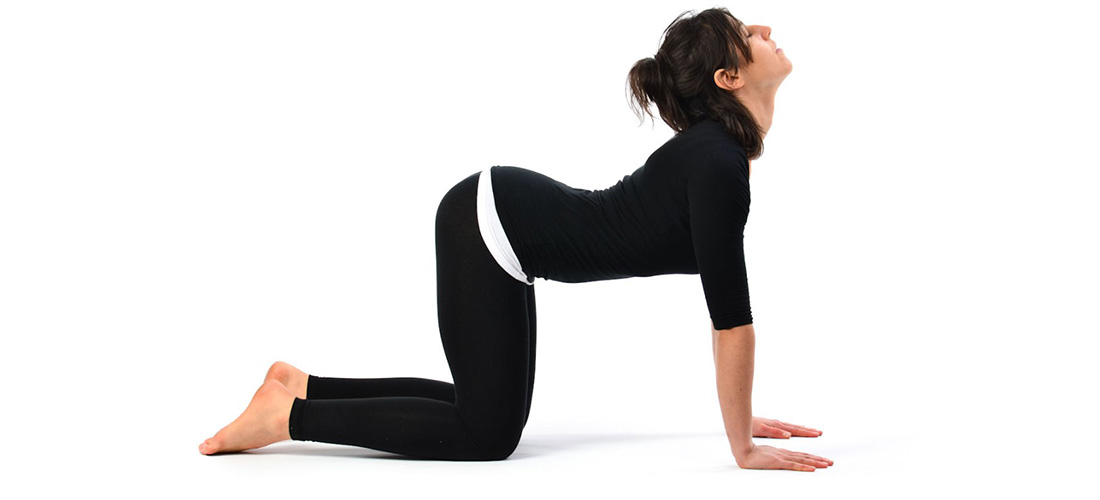

- Come into all fours/horse stance/ table top position
- Hips over the knees parallel to each other; wrists over the shoulder in line; head in neutral position; eyes look down
- Inhale, lift the seat bones and chest up; belly sinks down the floor; lift the head and eyes look up; drop the shoulders down away from ears to protect your neck
- Exhale, come back to neutral position. Repeat 1-3 minutes
- Tip: If you have a neck problem, keep the head in line with the torso instead of lifting it.
Marjaryasana (Cat Pose)
- Come into all fours/horse stance/ table top position
- Hips over the knees parallel to each other; wrists over the shoulder in line; head in neutral position; eyes look down
- Inhale, lift the seat bones and chest up; belly sinks down the floor; lift the head and eyes look up; drop the shoulders down away from ears to protect your neck
- Exhale, come back to neutral position. Repeat 1-3 minutes
- Tip: If you have a neck problem, keep the head in line with the torso instead of lifting it.
Bridge Pose (Setu Bandhasana)
- Come to lie on the back. Bend the knees, bringing the soles of the feet parallel on the mat close to the buttocks. Lift the hips up towards the ceiling. Interlace the fingers behind your back and straighten the arms, pressing them down into the mat.
- Roll one shoulder under and then the other. Lift the hips higher. Draw the chest toward the chin, but do not move the chin toward the chest. Make sure the feet stay parallel.
- Release the hands and bring the upper, middle, and then lower back down. Rest, allowing the knees to knock together.
- Beginners: For a restorative variation, bring a block under the sacrum. Let your weight rest on the block. When coming down, keep the hands interlaced under the weight of the body for a shoulder opener.
Matsyasana (Fish Pose)
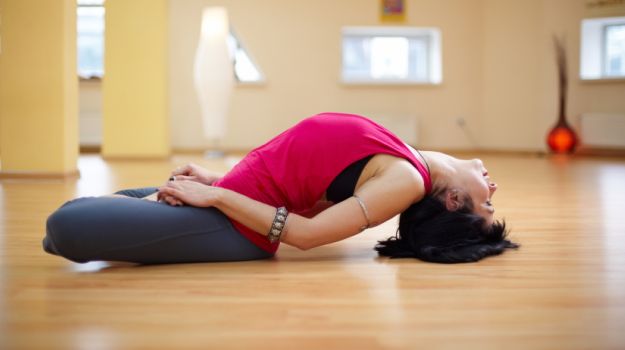

- Lie flat on your back, either on a mat or on a carpeted floor. Keep your knees straight and keep your feet together with toes pointed to the ceiling.
- Slide your hands under your thighs and buttocks. This motion should cause your chest to bow upward slightly.
- Bend the elbows and push them into the floor; use the bend of the elbows and arms to raise the chest higher, keeping the chest arched upward.
- When the chest is arched as high as possible, drop your head and rest the very top of your head on the floor. Your chin should point to the ceiling.
- While in this posture, breathe deeply and really enjoy the chest expansion. Hold this position for as long as is comfortable.
Note: An erect back relies not only on a straight spine but also on strong tummy muscles.
Ref: