


According to new research from Yale University School of Medicine, findings show that people who practice yoga and meditation at least three times a week may reduce their blood pressure, pulse and — most importantly — their risk of heart disease.


Yoga improves heart health in both healthy individuals and those with diagnosed heart disease, According to study conducted volunteers taking a six-week yoga-meditation program improved blood vessel function by 17%. Blood vessel function, also called endothelial function, is the way vessels contract and expand to aid blood flow and is a measure of healthy vessel function. However, study participants who had heart disease had close to a 70% improvement in endothelial function. Endothelial function is an important indicator of atherosclerosis because as the disease and plaque build-up progresses, the blood vessels become less supple and less able to constrict and expand. The yoga and meditation program included 40 minutes of postural yoga, 20 minutes of deep relaxation, 15 minutes of yoga breathing, and 15 minutes of meditation.
Yoga helps to cope with stress and anxiety, which can lead to coronary artery diseases (CAD). With a yoga lifestyle and a proper vegetarian diet, one can make the progression of CAD slower and the serious patients can recover faster. There are several poses that you can use in order to increase the health of your heart, and these poses are designed to help your blood to circulate properly and strengthen the heart muscle. The warrior pose and the triangle pose are designed to promote cardiovascular exercise, and prompt you to breathe strategically and adequately. This helps you to increase your stamina, which gives you more energy to complete your daily activities and allow your heart to pump blood through the body quicker. This will help the body to replenish itself quicker, and can even help you to sleep better. The tree pose, the mountain pose, and the lotus pose not only work to strengthen the heart, but can be used to increase flexibility, which can prevent muscle cramping in the future.
Some of the poses or asanas are:
Anjali Mudra
The word ‘Anjali’ means to adorn, honor, to celebrate or anoint. This mudra or gesture is also known as Hrdayanjali Mudra, which means, reverence to the self or the heart. This mudra is an excellent way to induce a peaceful state of mind. This mudra is a gesture of reverence to the divinity within.
Sit comfortably in a cross- legged position. Inhale and bring your hands together. The two hands are pressed against each other and held close to the heart. The head should be gently bowed as in prayer. Do these mudras for 5 minutes till a feeling of peace takes over.
Mountain Pose (Tadasana)
Promotes experience of stillness, strength, relax power, and immovable stability. The position has two primary lines of energy radiating outward from your center: one line moving upward through the spine and one line downward through the legs. Your hips will be in cat tilt.
Hands to Feet (Pada Hastasana)


Warrior Pose (Virabhadra)
This challenging pose strengthens the entire body while improving mental capacity and self control. Stand in mountain pose continuing with your smooth flowing breath. Jump your feet sides ways and sweep your arms out to the side so your ankles are below your wrists. Establish your foundation, by pulling your knees and thighs up, tucking your tailbone under, pushing your feet firmly into the floor. Visualize an imaginary line running vertically down the centre of your body, dropping your shoulders. Squeeze your arms and legs away from the centerline. Keep an awareness of this line as you turn your right foot out to 90 degrees and turn your left foot in to 70 degrees. Ensure the heel of your front foot aligns with arch of your back foot, hips facing forward. If your body wants to turn off centre, counter-act it by pushing simultaneously in opposite directions from the centre line. Inhale, an as you exhale bend your right leg, pulling up with the outside and inside of the thigh to form a right angle at the knee. Only go as low as you can with out turning your hips off centre. Ideally you want your knee directly above your ankle with you leg coming vertically out of the floor like pillar. Keep the power flowing through the back leg into the floor. Inhale lift the spine; exhale turn your head to look over your right arm. Take a few deep breaths through the nose. Hold the pose and breathe smooth.
Reverse the procedure back to mountain pose and repeat back to the other side.
Standing Spread Leg Forward Bend (Prasarita Padottanasana)


Exhale and, maintaining the length of the front torso, lean the torso forward from the hip joints. As your torso approaches parallel to the floor, press your fingertips onto the floor directly below your shoulders. Extend your elbows fully. Your legs and arms then should be perpendicular to the floor and parallel to each other. Move your spine evenly into the back torso so that your back is slightly concave from the tailbone to the base of the skull. Bring your head up, keeping the back of the neck long, and direct your gaze upward toward the ceiling.
Push your top thighs straight back to help lengthen the front torso, and draw the inner groins away from each other to widen the base of your pelvis. Take a few breaths. As you maintain the concavity of your back and the forward lift of your sternum, walk your fingertips between your feet. Take a few more breaths and then, with an exhalation, bend your elbows and lower your torso and head into a full forward bend. Make sure as you move down that you keep your front torso as long as possible. If possible rest the crown of your head on the floor.
Press your inner palms actively into the floor, fingers pointing forward. If you have the flexibility to move your torso into a full forward bend, walk your hands back until your forearms are perpendicular to the floor and your upper arms parallel. Be sure to keep your arms parallel to each other and widen the shoulder blades across the back. Draw your shoulders away from your ears.
Stay in the pose anywhere from 30 seconds to 1 minute. To come out, bring your hands back on the floor below your shoulders and lift and lengthen your front torso. Then with an inhalation, rest your hands on your hips, pull your tail bone down toward the floor, and swing the torso up. Walk or hop your feet back into Tadasana.
Triangle Pose (Trikonasana)
Laterally stretches the spine, tones spinal nerves, helps in the proper functioning of the digestive system. Makes the body feel lighter. Stand with your feet well apart (about 3-4 feet). Point your left foot to the left, and your right foot slightly to the left. Stretch your arm out at shoulder level and bring the right arm straight up, against your right ear. Now inhale. As you exhale, bend to the left and slightly forward to bypass your ribs. Slide your left hand down your left leg and hold on to the lowest part you can reach. Look out at your right hand. Take several full breaths in this position before releasing it. Repeat, bending to the right.
Standing Side Stretch (Ardha Chandrasana I)
Stand in Tadasana (Mountain Pose) with your feet together. Have your arms by your sides, gaze straight ahead, and establish a smooth flowing breath as you wait for the inner cue to begin. When you are ready, exhale. As you inhale, raise the left arm until it is vertical, alongside your ear, with the palm facing inward. Stretch outward through your arm and hand as you bring it up, circumscribing as large a circle as possible with your fingertips. Keep your left arm alongside your ear throughout the yoga pose. Place your right hand on your right hip.
Tree Pose (Vriksha-asana)


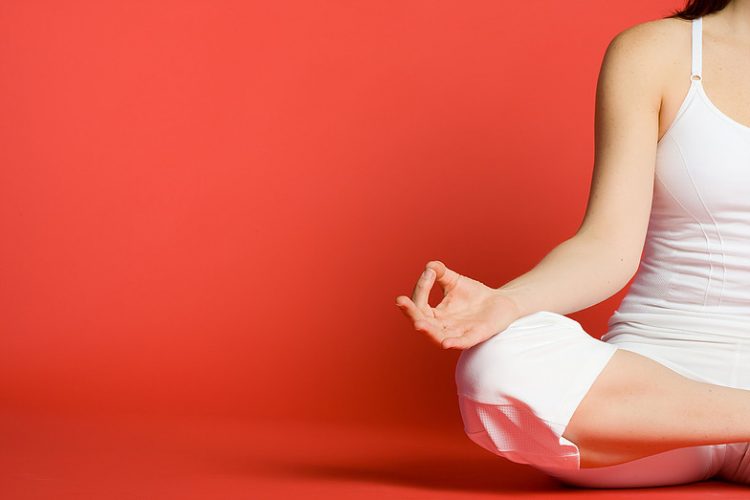
Lotus Pose (Padmasana)
Excellent meditation pose. Helps you relax, be more comfortable and alert .Sit on the floor in an easy crossed- leg pose. Clasp hold of your left foot with both hands and bring it high onto the right thigh, up into the groin. Bring the right leg over the left and place the right foot in the left groin. This is the full Lotus Yoga Asana. Uncross your legs and try it on the other side. To avoid becoming confused about which leg goes where, remember that the leg you uncross first is the first leg to cross on the second side.
Back bend
Begin on your back with your arms down by your sides, knees bent. Keep your feet flat on the floor, hip-distance apart and parallel. Press down on the inner edges of your feet as a way of hugging the inner thighs toward the midline, then lift your hips. Interlace your fingers underneath your hips and squeeze your arms as straight as your can.
Single Leg Raise
Prepares the body for asanas. Strengthens the abdominal and lower back muscles, trims the waist and the thighs. Inhaling, raise the right leg as high as possible; then exhaling, lowers it. Repeat with the left leg. Perform three times. Inhaling, raise the right leg then clasp it in both hands and pull it toward you, keeping your head down. Take a few breaths. Now raise your chin to your shin and hold for one deep breath; then, exhaling, lower the head down. Take a few breaths.
Double Leg Raise
Strengthen abdominal and lower back muscles. Used to come up from headstand. Trim the waist and the thighs. Lie flat on the floor. Inhaling, raise both legs, keeping your knees straight and your buttocks on the floor. Exhale and lower your legs. Repeat ten times. Make sure that your lower back remains flat on the floor while you bring the legs down, to avoid injuring your spine.
Cobra Pose
Coordinate movement and breath. Benefits the pelvis and spine Stretches and strengthens the spine and the surrounding muscles. Also massages the abdominal organs and is a good pose to combat menstrual irregularities and constipation. Lie face down with your feet together and your toes pointing behind you. Place your hands flat on the floor close to your body and beside your rib cage. As you inhale, gently push off your hands, lifting your head and chest off the ground and tilting your head back. Feel your chest moving forward as well as upward; this will help you keep from straining the lower back.
Child Pose


Leg Reclining Lunge
Stretches and tone all leg muscles. Bend your right leg and clasp the right foot with both hands again. Move the knee to the side of your chest and make the shinbone vertical, positioning the right heel directly above the right knee. Then energize the left leg, sliding the heel away from you, and press the sacrum flat. Pull downward with your hands, attempting to touch the right knee to the floor. Keep your sacrum flat and the left leg energized; do not tip sideways in your attempt to touch the floor. Move your shoulders toward the floor as you pull with your hands and round your chest.
Forward Bend
Invigorates the internal organs, reduces fat, and stimulates nervous system. From a lying position, with your arms straight out behind you, inhale and come up to a sitting position. Point your feet at the ceiling and pull your buttocks out from underneath you, so you’ll be sitting directly on your pelvic bone. Stretch your arms above your head, lengthening the spine. Pulling the abdomen in, exhale and fold forward from the pelvis, leading with the chest and keeping your back straight. Bring your chin toward your shins and your chest toward your thighs. Don’t bend from the middle of your spine. Continue right down and hold on to whichever part of your legs or feet you can comfortably reach without bending the knees. With practice, you can wrap your index fingers around your big toes and bring your elbows down to the floor, or stretch your arms out over your feet.
Sage Twist
Tones and massages the abdominal area esp. the liver, spleen and intestines. Relieves lower back pain caused by muscle tension. Sit on the floor with both legs straight. Bend the right leg, lift the right foot over the left leg, and place your right foot on the floor adjacent to the left knee. Wriggle the buttocks backward so you are on the tips of the sitting bones, sit tall, and check that both sitting bones are pressed equally into the floor. Wrap the left arm around the right knee, positioning the knee in the crook of the left elbow. Clasp hold of your wrists or elbows. Sit tall. Align your torso and elongate your core. Pull the abdominals and press downward through both sitting bones, especially the right one, bring your lower back in and up, and elongate your core upward through the crown of your head. Lift the chest away from the waist and pull inward with your arms, squeezing the right leg toward your chest as you gently thrust your chest toward the leg.
Final Corpse Pose
Helps you become more in touch with your body and improves your ability to control tension and to relax. Lie on your back, feel spread about 18 inches apart, and hands about 6 inches from your sides, palms up. Ease yourself into the pose, making sure the body is symmetrical. Let your thighs, knees and toes turn outward. Close your eyes and breathe deeply. Each time you inhale, feel a wave of oxygen flowing down to your feet; each time you exhale, feel the tension flowing out of your body, leaving your mind like a deep, still lake, without a ripple. Now dive deep into the center of this lake, deep within yourself, and experience your true nature.
Relaxation Pose
An essential part of Yoga Practice. Relaxes your body and mind, and makes you feel refreshed after doing the asanas and the pranayama. At the end of session of asanas, you should spend at least ten minutes in Final Relaxation. During this time, you relax each part of the body in turn. But in order to experience relaxation, you must first experience tension. Working up from the feet, you first tense and lift each part, then drop (but don’t place) it down. Now let your mind travel throughout the body, commanding each part to relax. Let yourself go. Sink deep into the quiet pool of the mind. To bring your consciousness back to your body, gently move your fingers and toes, take a deep breath and as your exhale, sit up.
You may follow this yoga routine to cope with Coronary Artery Disease and Heart Ailments in general. However, remember that you cannot treat CAD or any other heart disease with Yoga. Yoga is not a cure; it only helps you improve your entire body, including your system, to be able to cope with your affliction.