

Shoulder instability is a common issue among women, that can lead to serious injury if left ignored. From years of bad posture to overuse through sports or other repetitive activities, there are many reasons you might lose flexibility in your shoulders. The good news is that you can reverse these problems or even prevent them altogether by enhancing shoulder mobility.

- Utthita Parsvakonasana (Extended Side Angle Pose)
- Stand in Tadasana against a wall, with your heels and your buttocks touching it. Place the block on the floor behind your right foot. Inhale, and spread your feet 1m (3.5 ft) apart. Turn your right foot out to the right, until it is parallel to the wall.
- Turn your left foot in slightly to the right. Press the outer edge of your left foot firmly on the floor, and bend the right knee, pushing your thigh down until your calf is at right angles to the floor. Stretch your left arm away from your left shoulder.
- Bend to the right, and place your right palm on the block. Stretch the left arm up, with the palm facing forward. Now rotate the arm and bring it toward your left ear. Your left thumb should touch the wall. Turn your head and look at your left arm. Maintain a continuous stretch from the left ankle to the left wrist. Press your outer left foot into the floor.
- Move your shoulder blades into your body, and extend your spine toward your head. Hold the pose for 30 seconds. Repeat the pose on the other side.


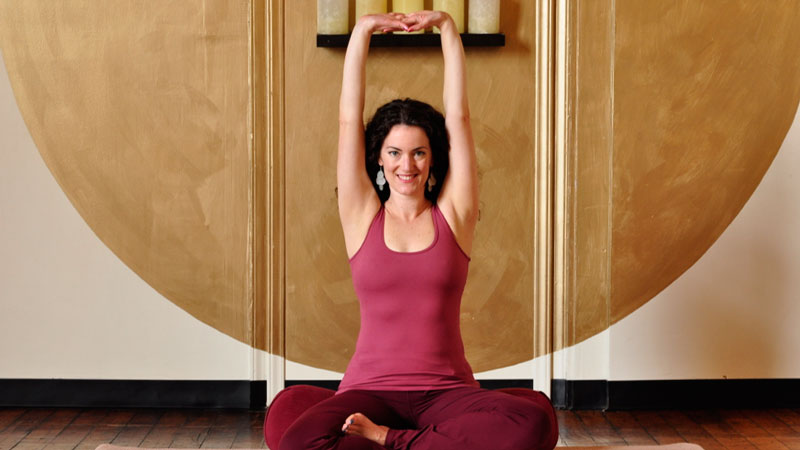
- Take a wide stance on your mat or on the ground. When you reach your arms wide, the ankles should be under your wrists with feet facing straight forward or turned lightly in.
- Bring your hands behind you to the low back. Interlace the fingers or, if that is too much, use a strap or band to clasp the hands behind the back.
- Inhale to lift the ribs up and away from the hips, opening the chest toward the sky.
- Exhale to fold forward. Bend the knees as much as you need to. Shift the weight to the front of the feet. Allow the hands to rise up off the lower back as much as possible, as if you are lifting them over your head and toward the front of your body.
- If it is too easy, try clasping the palms all the way together with straight arms. If it is too hard, allow the elbows to bend.
- Hold for one minute, then rise up, change the interlacing of your fingers so the other thumb is on top and repeat.
- Makarasana (dolphin pose)
- Come onto the floor on your hands and knees. Set your knees directly below your hips and your forearms on the floor with your shoulders directly above your wrists. Firmly press your palms together and your forearms into the floor.
- Curl your toes under, then exhale and lift your knees away from the floor. At first keep the knees slightly bent and the heels lifted away from the floor. Lengthen your tailbone away from the back of your pelvis and press it lightly toward the pubis. Against this resistance, lift the sitting bones toward the ceiling, and from your inner ankles draw the inner legs up into the groins.
- Continue to press the forearms actively into the floor. Firm your shoulder blades against your back, then widen them away from the spine and draw them toward the tailbone. Hold your head between the upper arms; don’t let it hang or press heavily against the floor.
- You can straighten your knees if you like, but if your upper back rounds it’s best to keep them bent. Continue to lengthen your tailbone away from the pelvis and lift the top of your sternum away from the floor.
- Stay between 30 seconds to one minute. Then release your knees to the floor with an exhale.


- Come into Tadasana (Mountain Pose).
- Bend the knees and bring the palms together behind the back with the fingertips pointing down. Broaden the back into the hands rather than pushing the back forward and jutting the ribs out.
- With the knees still bent (which decreases the need to thrust the rib cage forward and sway the back) turn the fingertips in towards the spine and slide the outer edges of the palms up the back into a prayer position.
- Straighten the legs. Broaden the upper back and shoulder blades.
- Hold the position for several breaths.
- Release and return to Tadasana (Mountain Pose).
- Dhanurasana (Bow Pose)
- Take prone lying position, legs together, hands straight by the side of the thighs, chin resting on the ground.
- Fold the legs at the knees and bring them on the thighs. Knees must remain together.
- Bring your hands backward and hold the toes of respective legs from the thumb and forefinger of the respective hands.
- Raise your legs a little up and simultaneously raise your head and chest.
- Holding the toes, pull the legs towards ears and bring the toes near the ear. Gaze in front.
- While returning to this original position, loosen your hands, take legs backward, let the thighs touch the ground, leave the toes and ultimately bring the legs and hand to the first position. Remember: Do not try to bring the toes near ears forcefully if it is difficult.Gradually increase the practice.


- Stand in Tadasana. Bend your knees slightly, lift your left foot up and, balancing on your right foot, cross your left thigh over the right. Point your left toes toward the floor, press the foot back, and then hook the top of the foot behind the lower right calf. Balance on the right foot. If you are a beginner, instead of hooking the raised foot and calf, press the big toe of the raised-leg foot against the floor to help maintain your balance.
- Stretch your arms straight forward, parallel to the floor, and spread your scapulas wide across the back of your torso. Cross the arms in front of your torso so that the right arm is above the left, then bend your elbows. Snug the right elbow into the crook of the left, and raise the forearms perpendicular to the floor. The backs of your hands should be facing each other.
- Press the right hand to the right and the left hand to the left, so that the palms are now facing each other. The thumb of the right hand should pass in front of the little finger of the left. Now press the palms together (as much as is possible for you), lift your elbows up, and stretch the fingers toward the ceiling.
- Stay for 15 to 30 seconds, then unwind the legs and arms and stand in Tadasana again. Repeat for the same length of time with the arms and legs reversed.
- Purvottanasana: Upward Plank Pose
- Come to the floor in a seated position with your legs extended forward, feet together. Place your hands several inches behind your hips with the palms on the floor and fingers point forward.
- As you inhale, press into your hands and feet to lift your body up. Press the feet down into the floor with your big toes and inner thighs pressing toward each other. Lift through the front of the body by pressing the hips and chest toward the sky. Keep your glutes relaxed. Slowly drop your head behind you.
- Modification: Go into a reverse tabletop position. Keep feet hips-distance apart and under the knees. Stay for five breaths.


- Slide your knees together in front of you, stacking the right knee directly on top of the left. If you find this movement to be difficult, try coming forward on your hands and knees before aligning the knees. When aligned, sit back in between your feet – which should be equidistant from your hips. Support your weight evenly amongst your sitting bones.
- For the upper body, extend your left arm up towards the sky. Then, bring your left hand down to the center of your back (hinging at the elbow). Reach your right arm out to the same side, parallel to the floor. Rotate the arm inward – your thumb will turn first towards the floor – until your palm faces the sky above.
- This movement should put your shoulder in correct position for the next one. Take a deep breath and, as you exhale, sweep your right arm behind and in the hollow of your lower back (as parallel to your spine as is comfortable).
- Keeping your spine long, hook fingers or hold hands behind your back. If they don’t reach, hold a belt or strap in both hands. Then, lift your left elbow toward the sky and draw your right elbow toward the ground. Keep your left arm close to your head. Center yourself.
- Lift your chest and firm your shoulder blades against your lower back for stability. As a beginner, breathe steady and deep 4-6 times while holding posture. Then, release your arms, uncross your legs, and repeat Gomukhasana with the left knee on top and left elbow pointing down.
- Sucirandhrasana (Threading the Needle)
- From the hands and knees table position, breathe out and slide your right hand, palm up, along the floor behind your left arm. Keep sliding until you bring your right shoulder to the ground and the right side of your face to rest on the floor.
- You can hold it here for a moment, and then twist your belly and then chest to the left as you breathe in and extend your left arm straight in the air.
- Hold it there, and if you’d like to go a little further, twist your arm down to rest your forearm on your back.
- Keep your hips facing forward and the tops of your feet on the mat. After you hold this pose, come back to Table Pose and switch to the other side.
Regular practice of these yoga asanas will help your shoulders to drop, your chest to open, and your breath to come more easily and deeper.