

|
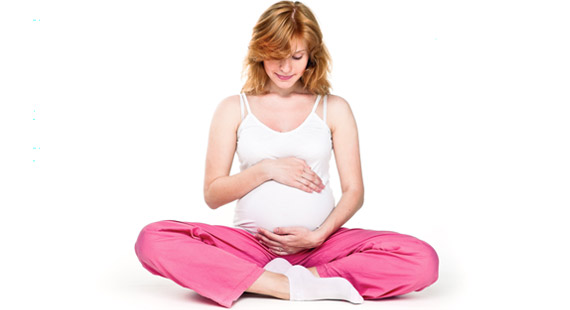
The practice of yoga gives you the opportunity to create a world (your body) for your baby that is healthy and peaceful. “What a child learns in the womb cannot be learned on earth”. |
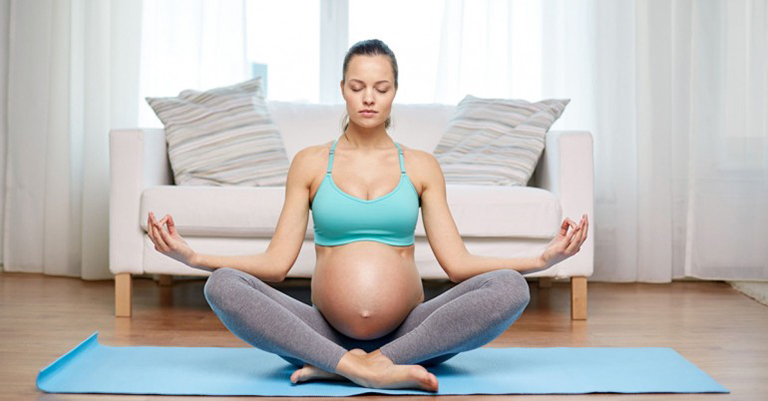
Yoga coordinates movement, breath and awareness. It addresses health and well being on several levels: physical, emotional, psychological and spiritual. Because of its many benefits and the pleasure derived from its practice, the time-honored art of yoga is becoming increasingly accepted everywhere as part of self-care during pregnancy and preparation for childbirth and motherhood.

Yoga holds a number of benefits both before and during pregnancy, however these practices call for modifications in order to accommodate the growing baby and protect the placenta. If you experience cramping, bleeding or prolonged cessation of fetal movement, stop practicing immediately and call your doctor.
Benefits of practicing yoga during pregnancy
- Yoga relies heavily on breathing techniques to make the exercise fruitful. Exhale and inhaling deeply provides oxygen to the whole body, something we desperately need during pregnancy. The fetus stands to gain the benefit of this charged blood pumping in. While doing the exercise, breathing and moving the body sets the pace, and each is incomplete without the other. The results of this coordinated activity are phenomenal.
- Yoga exercises also help in pre and postnatal depression, basically by relaxing the mind and putting a lot of fears at rest. The primary advantage of practicing Yoga is that the essential breathing exercises provide a mental calmness to the would-be Mom. This peace descends to her baby, and also helps her to take the crucial time of childbirth in her stride.
- Physically speaking, the mild yogic exercises help maintain muscle tone, especially for the back and pelvic muscles that take such a tremendous beating during the nine months of pregnancy and about a year thereafter, till the baby is a toddler.
- Yoga Nidra (Yogic Sleep) also relaxes the mind and body to such an extent that in many cases it even helps during the trauma of childbirth. The gentle toning and stretching exercises do wonders for preparing the body for caring the baby as well a delivering it.
Here are certain general precautions to be taken while practicing yoga:
- Always practice as if the belly (baby) were larger than it actually is. Adjust your pregnancy yoga practice to a lower level and intensity than that of your pre-pregnancy practice.
- Avoid poses that stretch the muscles too much, particularly the abdominal muscles. Remember, you are more apt to tear and strain muscles now because the pregnancy hormone relaxin, which allows the uterus to expand, also acts on all connective tissue.
- Avoid performing any poses on your back after the first trimester as that can cut blood flow to the uterus.
- When bending forward, bend from the hips, not the back. Maintain as much distance as possible between the breast bone and the pubic bone to make breathing easier.
- Keep the pelvis upright when stretching the chest and the front of the thighs
- When practicing twisting poses, twist more from the shoulders and back to avoid putting any pressure on your abdomen.
- Perform standing poses with your heel to the wall or use a chair for support to avoid losing your balance and risking injury to you or your baby.
- Avoid jumping, jump-throughs, jump-backs, or rolling. Step or crawl instead.
During First Trimester
Do only light stretching once pregnancy is confirmed (about Week 5). The time off gives the placenta a chance to become firmly rooted. If too much of your energy goes into yoga practice, your body may reject the pregnancy.
There is some evidence to suggest that light yoga practice during the first trimester will help a woman retain her pregnancy by helping to eliminate toxins from the body. The lessening of nausea during or following yoga practice may be an indication of toxins being eliminated. If you have severe morning sickness, you should probably save your energy and wait for the morning sickness to end (usually by Month 4) before resuming yoga practice. If you feel all right practicing with morning sickness, try not to practice on an empty stomach. Drink water during practice to prevent dehydration and uterine contractions.
During Second Trimester
Before beginning make sure the room is not too hot. Also, drink small amounts of water during practice if your throat becomes dry or if you feel nauseated. Don’t try to work up a huge sweat while you practice.

While performing Suryanamaskar A (sun salutation A):
In the forward-bending movements, keep the chest at least 80-85 degrees from the floor. Place the hands in front of the feet rather than aligned with the feet. Step rather than jump. When you first start to show or feel your belly just needs the extra space, start the sequence with the feet hip-width apart in samasthiti before you bend forward.
When folding forward, keep the chest at least 80-85 degrees from the floor, particularly in poses that place the legs together. Focus on pulling up rather than folding forward. |
Suryanamaskar B (sun salutation B)
When stepping forward from downward dog into a lunge, allow the back heel of the back foot to lift off the floor (but keep the ball of the foot firmly planted) to avoid compression of the belly; your hands and arms will need to take up more of the weight from now on. After your front foot is stabilized in the lunge position, set the back heel back down on the floor at the usual 80-85 degree angle to the front foot. Keep the back leg and back foot active and firm in the virabhadrasana position. Start the sequence with feet hip-width apart in samasthiti in Month 6 or whenever more space is required.
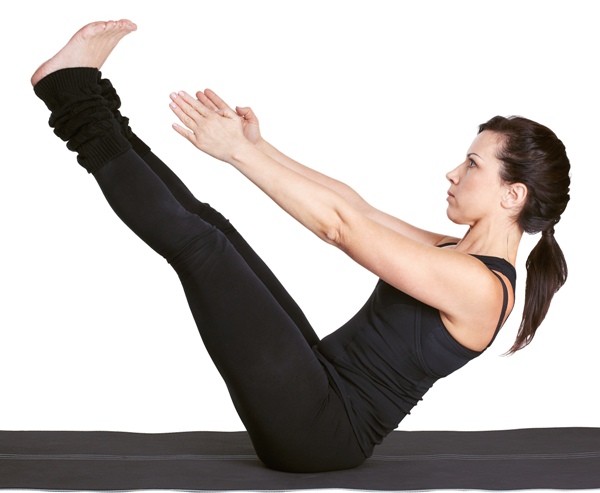
Navasana – Boat Pose (Modified)
This asana increases strength in mid section while simultaneously lengthening the back muscles. Prevents nagging back pain.
From seated start with the knees and bring the hands to a forty five-degree angle. Have a sense that the tailbone is rooting and the back is lengthening at the same time. Think, back length/abdominal strength. Extend one feet straight. Try not to sag in the lower back. Alternate each set with one foot on the floor while extending the other leg. Having one foot on the floor will help with balance and prevent strain on the lower back and abdominal area.
Note: If the back rounds even slightly slowly return back to seated position.
Utthita Hasta Padangusthasana (Modified)
In this asana, your lower (standing) leg, your pelvis, and your torso should all be in Tadasana (refer to the actions for that pose). Do not let the raising of one leg deter you from establishing Tadasana in the rest of your body, particularly in your pelvis and hips.
As the belly becomes more prominent, move the leg to the side of the belly rather than the front. Work on lengthening the leg away from you rather than folding towards it.
To avoid reducing the blood flow to the uterus, do not stay on the back for more than 3 minutes at a time. If you experience difficulty breathing, nausea, or dizziness while doing poses on your back, omit such poses altogether. |
Baddhakonasana (bound – angle or cobbler pose)
Sit tall on the fronts of your sits bones with the soles of your feet together, knees splay open lifting your spine away from the floor. You may need to sit on a blanket if you hips are tight. Also know you can place pillows under your knees if it is too strenuous on your inner tights.
The pelvis, pelvic floor and lower back are opened and energized with this posture. Flexibility is developed in the hip joints, groins, knees and ankles. Tightness and tension across the lower back is alleviated.
Virabhadrasana (warrior posture)
This asana strengthens the thigh and back muscles which are so important when carrying, and also delivering, the baby. The woman stands with feet apart turned to one side, inhales and extends the arms wide to shoulder height, exhales and turns to the side, inhales and extends arms over her head, exhales and bends the front knee.
Savasana (corpse pose)
Lie on your left side in a fetal position to avoid compressing the blood flow to the uterus. Use a rolled towel or mat under your head to make the neck more comfortable. You can also place a rolled blanket or bolster between your legs and hold one between your arms to make your belly more comfortable.

Backbends
In upward dog, keep the belly soft and move into the arch deliberately and slowly, concentrating on keeping the hands flat on the floor and the arms straight. If there is any undue tightness in upward dog, do not do full backbends. The placement of the placenta and the individual angle of your uterus may influence your ability to do full backbends, so don’t worry if you have to give up backbends. If you can do backbends comfortably, work into the arch slowly and do not try to make it perfect or tight. The belly should not feel tight or uncomfortable. Allow the psoas, frontal hip bones, and tops of the thighs to soften. Pay attention to whether your lower back is tightening in the backbends. Due to the increased weight of the belly, the lower back naturally tightens over time to support the front of the body, so avoid inadvertantly tightening the lower back during backbending as well. However, even slight backbending will help “pop” the spine and alleviate backaches from the weight gain. Do not do drop-overs or flips, since there is a risk of overstretching the abdominal muscles in these movements. An alternative to full back bending is the modified bridge pose.
Omit extreme twists, which may cause placental abruption: |
| Utthita trikonasana B [extended triangle pose B]
Utthita parsvakonasana B [extended sideways angle pose B] Marichyasana C [marichya pose C] Marichyasana D [marichya pose D] |
Omit poses that press the heel into the uterus while folding or sitting: |
| Ardha baddha padmottanasana [half-lotus bound, standing forward bend] (modification: don’t fold, and wrap the arm behind the back to grasp the big toe only if the belly does not feel uncomfortably tight in this position)
Janu sirsasana C [head of the knee pose C] Marichyasana B [marichya pose B] Marichyasana D [marichya pose D] Garbha pindasana [embryo in the womb pose] (modification: sit in an easy cross-legged position and don’t roll) Seated lotus and half-lotus poses generally, unless you can keep the lotus very loose and not tweak the knees. |
Omit poses on the belly or that would compress the belly: |
| Bhujapidasana [arm pressure pose]
Kurmasana [tortoise pose] Supta kurmasana [sleeping tortoise pose] |
During Third Trimester
Follow all of the above guidelines plus the following:
While performing forward bends, adjust legs to hip-width or wider distance to accommodate the growing belly. For the last 6 weeks of the pregnancy, omit navasana and other poses that involve a reclined position (where the knees are higher than the pelvis), which can work against Optimal Foetal Positioning.
Suryanamaskar A & B:
Continue placing the hands in front of the feet in the forward-bending movements, using the fingertips rather than the palms to touch the floor in dwi and trini (the second and third vinyasas) and the like. If the belly becomes so large (e.g., Month 8) that it becomes too difficult to step forward in suryanamaskar B without straining the hip or front knee, omit suryanamaskar B and substitute suryanamskar A (total 10 A’s).
Marjaraiasana (Cat posture)
Is invaluable at this time. This involves kneeling on all fours, breathing in whilst gently looking up and then, on an out-breath, gently rounding the spine. The hammock of muscles of the abdomen which cradle the baby are strengthened and toned with this exercise. Again this helps to make both mother and baby comfortable. The whole of the pelvic region is gently massaged. Also it can reduce lower back tension and the baby is encouraged, by gravity, into the favorable anterior position. In the hollow spine position, care should be taken not to over-extend the abdominal muscles.
Janu Sirsasana (modified)
With right leg folded in and left leg extended, pull back the toes on your left foot with your left hand while holding your left wrist or forearm with your right hand. This modification allows to maintain the hand-foot energy flow in the forward bends while providing support for the lower back. No need for straps! You can also simply hold the sides of the calves.
Hand position in seated poses: Instead of holding your toes with both hands, slide one hand up to the wrist or forearm of the opposite arm while continuing to lengthen the chest. |
Do not practice inversions in the third trimester. Such poses will place undue pressure on the placenta. The last 8 weeks of pregnancy are a time to encourage the downward flow of energy and the correct downward positioning of the baby’s head (Optimal Foetal Positioning) to facilitate labor. |
If something does not feel right, or if your baby seems to object to a certain pose, do not do the pose. Every pregnancy is different.
Yoga is a low-impact exercise that can help expectant moms to stay in shape. And the breathing meditations practiced in a yoga class may come in handy during labor! If you are interested in practicing yoga during your pregnancy, be aware that certain postures should be avoided (such as those that involve laying on the back or belly). During pregnancy, hormones cause joints in the body to become loose (that’s why women often increase in shoe size). Yoga postures can help to stabilize and strengthen these joints and promote flexibility in the muscles and fascia.