


Disconnect from the frenetic activity of daily life and let your speedometer return to 0 mph. Restorative yoga prepares the mind and body for the inward stroke of meditation and deepened awareness. Moving slowly through the poses allows you to explore your mind and body at a steady and natural tempo.
Get ready to calm and reset your entire body and mind for ultimate relaxation
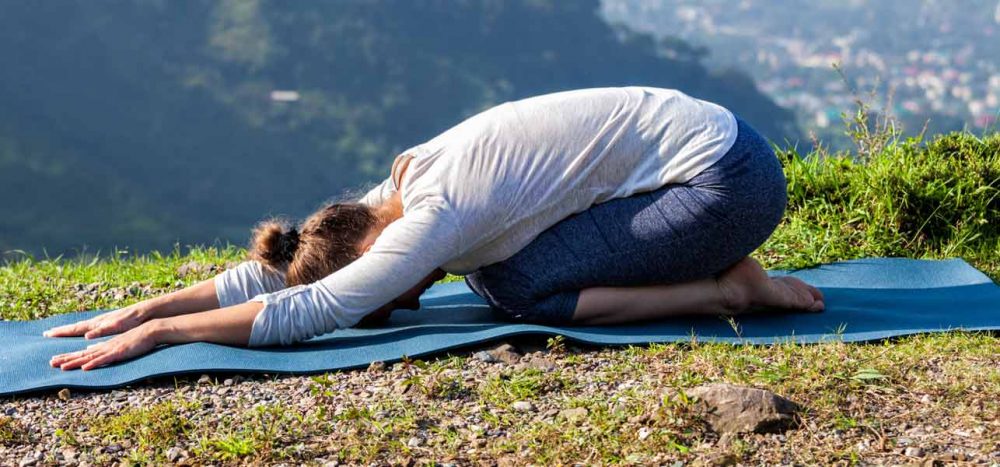

- Balasana (Child’s Pose): Kneel on the floor. Touch your big toes together and sit on your heels, then separate your knees about as wide as your hips. Exhale and lay your torso down between your thighs. Broaden your sacrum across the back of your pelvis and narrow your hip points toward the navel, so that they nestle down onto the inner thighs. Lengthen your tailbone away from the back of the pelvis while you lift the base of your skull away from the back of your neck. Lay your hands on the floor alongside your torso, palms up, and release the fronts of your shoulders toward the floor. Feel how the weight of the front shoulders pulls the shoulder blades wide across your back. Stay anywhere from 30 seconds to a few minutes. Beginners can also use Balasana to get a taste of a deep forward bend, where the torso rests on the thighs. Stay in the pose from 1 to 3 minutes. To come up, first lengthen the front torso, and then with an inhalation lift from the tailbone as it presses down and into the pelvis.
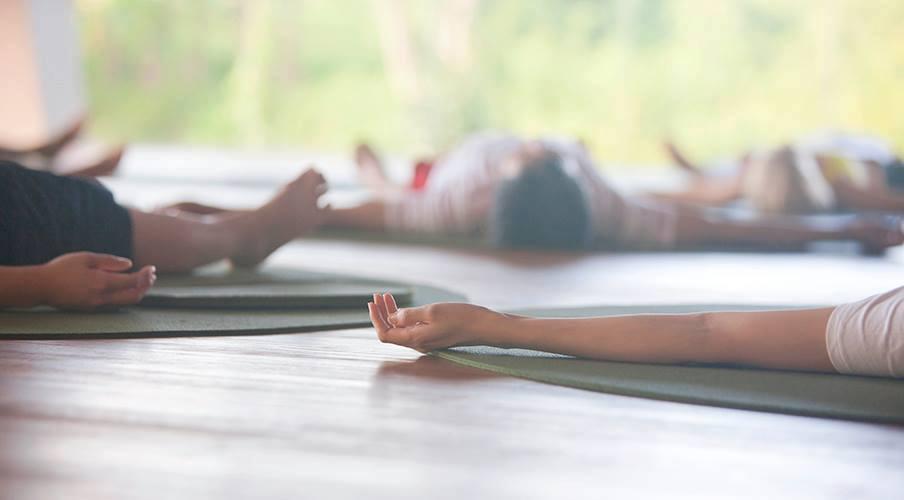
- Savasana (Corpse Pose) : Place the body in a neutral position. Sit on the floor with your knees bent, feet on the floor, and lean back onto your forearms. Lift your pelvis slightly off the floor and, with your hands, push the back of the pelvis toward the tailbone, then return the pelvis to the floor. Inhale and slowly extend the right leg, then the left, pushing through the heels. Release both legs, softening the groin, and see that the legs are angled evenly relative to the mid-line of the torso, and that the feet turn out equally. Narrow the front pelvis and soften (but don’t flatten) the lower back. With your hands lift the base of the skull away from the back of the neck and release the back of the neck down toward the tailbone. If you have any difficulty doing this, support the back of the head and neck on a folded blanket. Broaden the base of the skull too, and lift the crease of the neck diagonally into the center of the head. Make sure your ears are equidistant from your shoulders. Reach your arms toward the ceiling, perpendicular to the floor. Rock slightly from side to side and broaden the back ribs and the shoulder blades away from the spine. Then release the arms to the floor, angled evenly relative to the mid-line of torso. Turn the arms outward and stretch them away from the space between the shoulder blades. Rest the backs of the hands on the floor as close as you comfortably can to the index finger knuckles. Make sure the shoulder blades are resting evenly on the floor. Imagine the lower tips of the shoulder blades are lifting diagonally into your back toward the top of the sternum. From here, spread the collarbones. In addition to quieting the physical body in Savasana, it’s also necessary to pacify the sense organs. Soften the root of the tongue, the wings of the nose, the channels of the inner ears, and the skin of the forehead, especially around the bridge of the nose between the eyebrows. Let the eyes sink to the back of the head, then turn them downward to gaze at the heart. Release your brain to the back of the head. Stay in this pose for 5 minutes for every 30 minutes of practice. To exit, first roll gently with an exhalation onto one side, preferably the right. Take 2 or 3 breaths. With another exhalation press your hands against the floor and lift your torso, dragging your head slowly after. The head should always come up last.
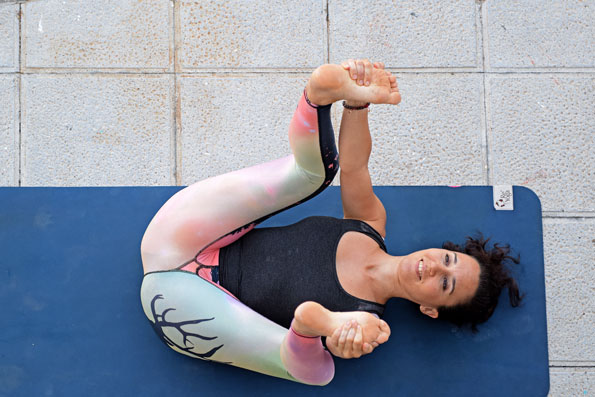

- Ananda Balasana (Happy Baby Pose): Lie on your back. With an exhale, bend your knees into your belly. Inhale, grip the outsides of your feet with your hands (if you have difficulty holding the feet directly with your hands, hold onto a belt looped over each sole.) Open your knees slightly wider than your torso, then bring them up toward your armpits. Position each ankle directly over the knee, so your shins are perpendicular to the floor. Flex through the heels. Gently push your feet up into your hands (or the belts) as you pull your hands down to create a resistance.
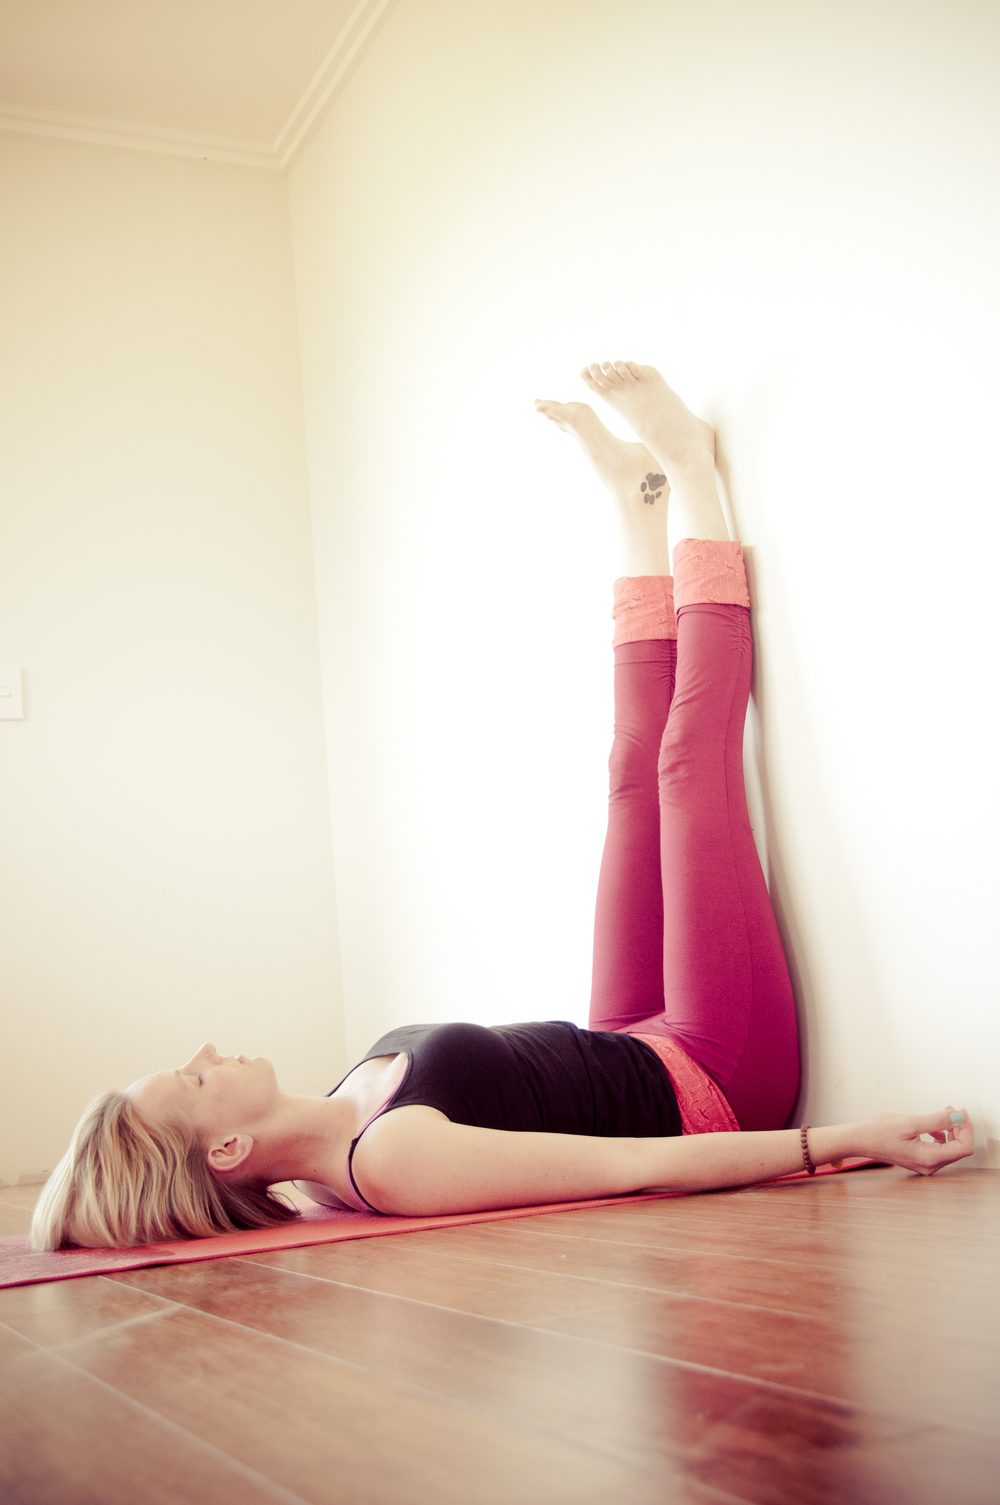

- Viparita Karani (Legs-Up-the-Wall Pose) Before performing the pose, determine two things about your support: its height and its distance from the wall. If you’re stiffer, the support should be lower and placed farther from the wall; if you’re more flexible, use a higher support that is closer to the wall. Your distance from the wall also depends on your height: if you’re shorter move closer to the wall, if taller move farther from the wall. Experiment with the position of your support until you find the placement that works for you. Start with your support about 5 to 6 inches away from the wall. Sit sideways on right end of the support, with your right side against the wall (left-handers can substitute “left” for “right” in these instructions). Exhale and, with one smooth movement, swing your legs up onto the wall and your shoulders and head lightly down onto the floor. The first few times you do this, you may ignominiously slide off the support and plop down with your buttocks on the floor. Don’t get discouraged. Try lowering the support and/or moving it slightly further off the wall until you gain some facility with this movement, then move back closer to the wall.Your sitting bones don’t need to be right against the wall, but they should be “dripping” down into the space between the support and the wall. Check that the front of your torso gently arches from the pubis to the top of the shoulders. If the front of your torso seems flat, then you’ve probably slipped a bit off the support. Bend your knees, press your feet into the wall and lift your pelvis off the support a few inches, tuck the support a little higher up under your pelvis, then lower your pelvis onto the support again.
Lift and release the base of your skull away from the back of your neck and soften your throat. Don’t push your chin against your sternum; instead let your sternum lift toward the chin. Take a small roll (made from a towel for example) under your neck if the cervical spine feels flat. Open your shoulder blades away from the spine and release your hands and arms out to your sides, palms up. Keep your legs relatively firm, just enough to hold them vertically in place. Release the heads of the thigh bones and the weight of your belly deeply into your torso, toward the back of the pelvis. Soften your eyes and turn them down to look into your heart. Stay in this pose anywhere from 5 to 15 minutes. Be sure not to twist off the support when coming out. Instead, slide off the support onto the floor before turning to the side. You can also bend your knees and push your feet against the wall to lift your pelvis off the support. Then slide the support to one side, lower your pelvis to the floor, and turn to the side. Stay on your side for a few breaths, and come up to sitting with an exhalation.
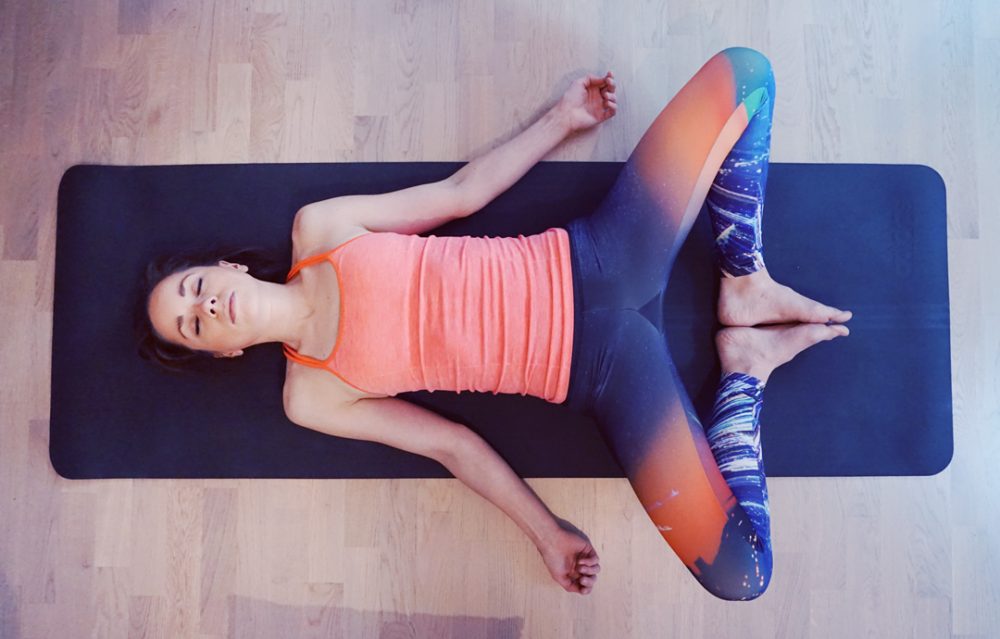

- Supta Virasana (Reclining Bound Angle Pose) : Perform Baddha Konasana. Exhale and lower your back torso toward the floor, first leaning on your hands. Once you are leaning back on your forearms, use your hands to spread the back of your pelvis and release your lower back and upper buttocks through your tailbone. Bring your torso all the way to the floor, supporting your head and neck on a blanket roll or bolster if needed. With your hands grip your topmost thighs and rotate your inner thighs externally, pressing your outer thighs away from the sides of your torso. Next slide your hands along your outer thighs from the hips toward the knees and widen your outer knees away from your hips. Then slide your hands down along your inner thighs, from the knees to the groins. Imagine that your inner groins are sinking into your pelvis. Push your hip points together, so that while the back pelvis widens, the front pelvis narrows. Lay your arms on the floor, angled at about 45 degrees from the sides of your torso, palms up. The natural tendency in this pose is to push the knees toward the floor in the belief that this will increase the stretch of the inner thighs and groins. But especially if your groins are tight, pushing the knees down will have just the opposite of the intended effect: The groins will harden, as will your belly and lower back. Instead, imagine that your knees are floating up toward the ceiling and continue settling your groins deep into your pelvis. As your groins drop toward the floor, so will your knees. To start, stay in this pose for one minute. Gradually extend your stay anywhere from five to 10 minutes. To come out, use your hands to press your thighs together, then roll over onto one side and push yourself away from the floor, head trailing the torso.
- Supta Padangusthasana (Reclining Hand-to-Big-Toe Pose) : Lie supine on the floor, legs strongly extended. If your head doesn’t rest comfortably on the floor, support it on a folded blanket. Exhale, bend the left knee, and draw the thigh into your torso. Hug the thigh to your belly. Press the front of the right thigh heavily to the floor, and push actively through the right heel. Loop a strap around the arch of the left foot and hold the strap in both hands. Inhale and straighten the knee, pressing the left heel up toward the ceiling. Walk your hands up the strap until the elbows are fully extended. Broaden the shoulder blades across your back. Keeping the hands as high on the strap as possible, press the shoulder blades lightly into the floor. Widen the collarbones away from the sternum. Extend up first through the back of the left heel, and once the back of the leg between the heel and sitting bone is fully lengthened, lift through the ball of the big toe. Begin with the raised leg perpendicular to the floor. Release the head of the thigh bone more deeply into the pelvis and, as you do, draw the foot a little closer to your head, increasing the stretch on the back of the leg. You can stay here in this stretch, or turn the leg outward from the hip joint, so the knee and toes look to the left. Pinning the top of the right thigh to the floor, exhale and swing the left leg out to the left and hold it a few inches off the floor. Continue rotating the leg. As you feel the outer thigh move away from the left side of the torso, try to bring the left foot in line with the left shoulder joint. Inhale to bring the leg back to vertical. Lighten your grip on the strap as you do, so that you challenge the muscles of the inner thigh and hip to do the work. Hold the vertical position of the leg anywhere from 1 to 3 minutes, and the side position for an equal length of time. Once you have returned to vertical release the strap, hold the leg in place for 30 seconds or so, then slowly release as you exhale. Repeat on the right for the same length of time.
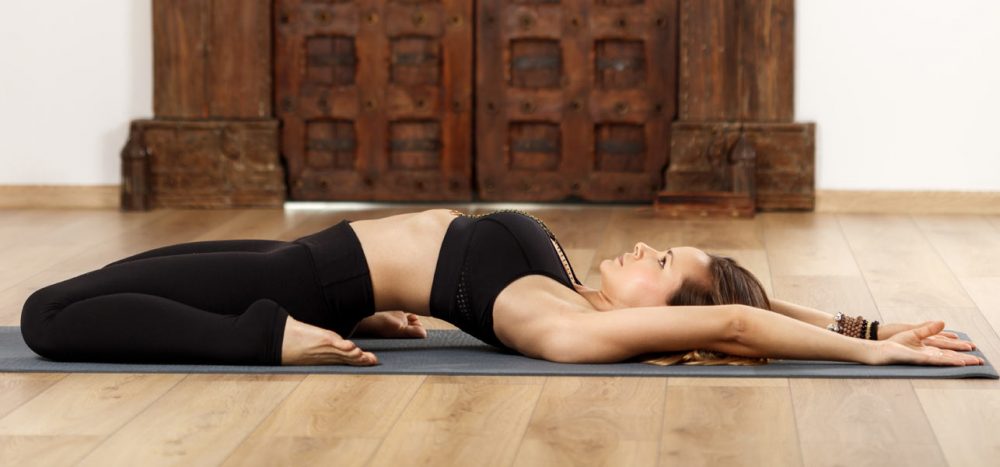
- Supta Virasana (Reclining Hero Pose): Perform Virasana. Exhale and lower your back torso toward the floor. First lean onto your hands, then your forearms and elbows. Once you are on your elbows, place your hands on the back of the pelvis and release your lower back and upper buttocks by spreading the flesh down toward the tailbone. Then finish reclining, either onto the floor or a support blanket or bolster.
If your front ribs jut up sharply toward the ceiling, it’s a sign of tight groins, which pulls your front pelvis toward your knees and causes your belly and lower back to tense. Use your hands to press your front ribs down slightly and lift your pubis toward your navel. This should lengthen your lower back and lower it toward the floor. If it does no’t, raise yourself onto a higher support. Then lay your arms and hands on the floor, angled about 45 degrees from the sides of your torso, palms up. Sink the heads of the thighbones deep into the back of the hip sockets. It’s alright to lift your knees a little away from the floor to help soften your groins; in fact, you can raise your knees a few inches on a thickly folded blanket. You can also allow a little bit of space between your knees as long as your thighs remain parallel to each other. Do not, however, allow the knees to splay apart wider than your hips – this will cause strain on the hips and lower back. To begin, stay in this pose for 30 seconds to 1 minute. Gradually extend your stay to 5 minutes. To come out, press your forearms against the floor and come onto your hands. Then use your hands to lift your torso into Virasana. As you come up, lead with your sternum, not your head or chin. Come out of Virasana in the recommended manner.
Practice these poses for ultimate Relaxation.