The term ‘amenorrhoea’ literally means ‘the absence of periods’. There are a wide variety of reasons why you may not be having periods, like heavy exercise, stress or eating disorder and you must always take steps to find out what is causing your amenorrhoea.
- Primary amenorrhoea is when menses have not occurred by the time of the expected menarche. This may be taken as 14 years in the absence of secondary sexual characteristics, but it is worth waiting until 16 if other features are developing normally.
- Secondary amenorrhoea is when menstruation has previously occurred but it has stopped for at least 6 consecutive months.
Check out Yoga poses for Amenorrhoea
- Tadasana Urdhva Hastasana (Mountain pose with arms stretched up)
Props- The wall helps you to align your body correctly, makes adjustments in the pose easier, and gives stability to the final pose.
1. Stand in your bare feet in Tadasana on an even, uncovered surface. Exhale, and stretching from your waist, lift your arms in front of you, to shoulder-level. Keep your palms open and facing each other.
2. Raise your arms above your head, perpendicular to the floor. Stretch your arms and fingers. Push your shoulder blades into your body.
3. Stretch your arms further up from your shoulders, keeping them parallel to each other. Extend your wrists, palms, and fingers toward the ceiling. Feel the stretch along both sides of your body.
4. Pull in your lower abdomen. Turn your wrists so that the palms face front. Hold the pose for 20-30 seconds. Breathe evenly.
Caution
Do not practice this asana if you have stress-related headaches. Migraine, eye strain, low blood pressure, osteoarthritis of the knees, bulimia, diarrhoea, insomnia, or leukorrhoea. If you have high blood pressure, do not hold the pose for more than 15 seconds. If you have a slipped disc or a prolapsed uterus, keep your feet together, and your knees apart.
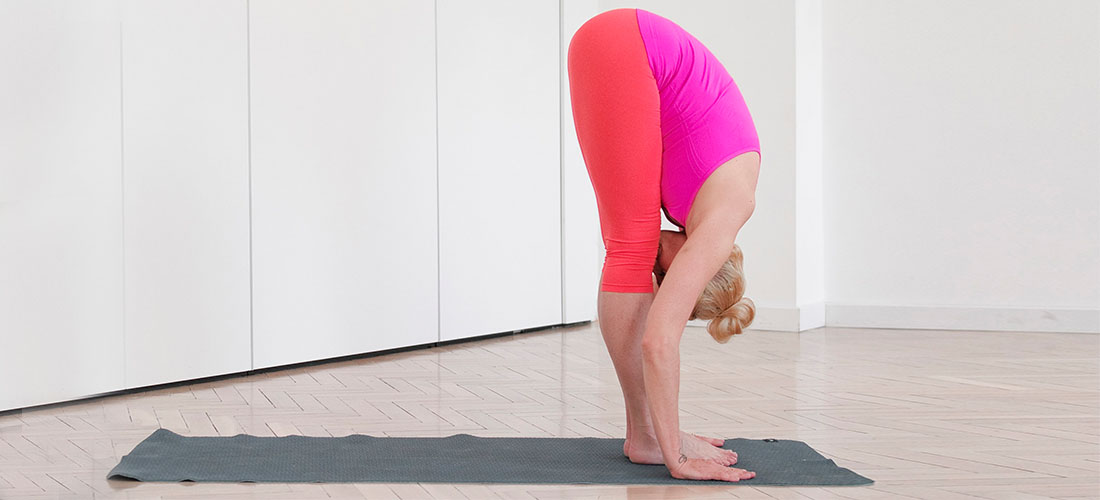
Uttanasana (Intense forward stretch)
Props- A foam block and five wooden blocks. Stack three wooden blocks on top of the foam block. Place a wooden block on either side of the stacked blocks.
1. Stand in tadasana. Separate your legs to a distance of 30cm (1ft). Keep your feet parallel to each other, with the toes pointing forward. Pull up your kneecaps.
2. Inhale and raise your arms toward the ceiling, your palms facing forward. Push your spine up.
3. Bend from the waist toward the floor. To increase the stretch of your spine, vital for correct practice, press your heels down on the floor.
4. Rest the crown of your head on the blocks in front of you, and place your palms on the blocks beside your feet. Pull in your kneecaps. Extend your hamstrings and pull your inner legs upward. Feel one single stretch from the crown of your head to your heels. Hold the pose for 1 minute.
Caution
Do not practice this asana if you have osteoarthritis of the knees, or diarrhoea. Patients of rheumatoid arthritis who have fever should avoid this asana. Avoid the pose if you have excessive curvature of the lumbar spine or scoliosis. If you have low blood pressure, come out of the pose gradually to avoid dizziness.
UTTHITA TRIKONASANA (Extended triangle pose)
Props- A wall, a block, and a mat. Practicing against a wall supports the body, reduces strain, and helps to align the body correctly. The mat prevents your feet from slipping, helping to maintain the final balance in the pose. The block helps those with stiff backs to reach the floor, and allows for greater extension of the spine, neck, and shoulders.
1. Spread a mat against a wall. Place a wooden block on its long side on the right edge of the mat. Stand in Tadasana on the centre of the mat. Inhale, then spread your feet about 1m (3.5ft) apart. Your heels and buttocks should touch the wall. Raise your arms out to your sides until they are in line with your shoulders.
2. Now, turn the right foot out to the right until it is parallel to the wall. Turn your left foot in slightly to the right. Your left heel and buttocks should touch the wall. Keep your left leg straight. Stretch your arms away from your body, keeping them parallel to the floor, with your palms facing down.
3. Bend to the right and extend your right arm toward the floor. Place your right palm on the block. Pull the tailbone into your body, keeping your left buttock and shoulders firmly pressed to the wall. Raise the left arm up toward the ceiling. Turn your head and look at your left thumb. Rest your weight on both heels, and not on your right palm. Breathe evenly, not deeply. Hold the pose for 20-30 seconds. Repeat the pose on the other side.
Caution
Do not practice this asana if you have stress-related headaches, migraine, eye strain, diarrhea, low blood pressure, psoriasis, varicose veins, or if you are depressed, or extremely fatigued. Patients of rheumatoid arthritis who have fever should avoid this asana. Do not practice during menstruation. If you have high blood pressure, do not look up at the raised arm in the pose. If you have cervical spondylosis, do not look up for too long.
Salamba Sirsasana (Headstand)
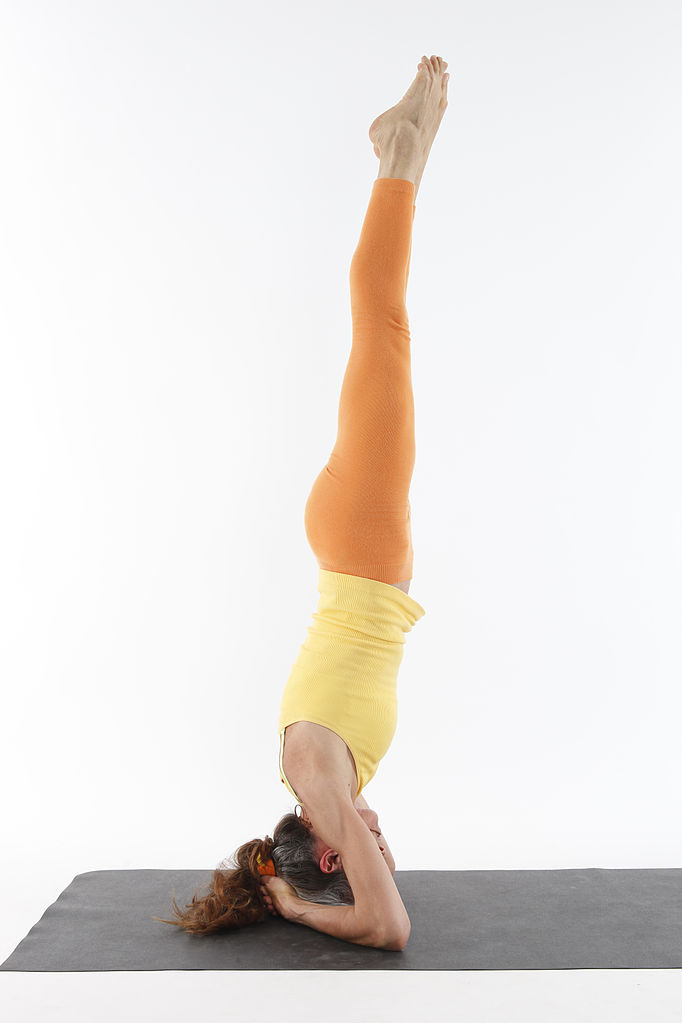
1. Kneel on the floor in Virasana. Clasp the inside of your left elbow with your right hand and the inside of your right elbow with your left hand. Now lean forward and place your elbows on the floor. Ensure that the distance between your elbows is not wider than the breadth of the shoulders. Release your hands and interlock your fingers to form a cup with your hands. Keep your fingers firmly locked, but not rigid. Place your joined hands on the floor.
2. Place the crown of your head on the floor, so that the back of the head touches your cupped palms. Check that only the crown is resting on the floor, not the forehead, or the back of the head. In the final pose, your weight must rest exactly on the centre, not the back or front, otherwise, the pressure will fall on your neck or eyes, causing your spine to bend. Make sure that your little fingers touch the back of the head, but are not underneath it. Hold this position for a few seconds, breathing evenly.
3. Push up on the balls of your feet and straighten your knees. Keep your heels raised off the floor. To ensure that your torso is perpendicular to the floor, walk your feet toward your head. Until the back of your body forms a vertical line from your head to the back of the waist.
4. Exhale, and bring your knees toward the chest. Then, press your toes down on the floor, and push your legs upward, off the floor. This action resembles a hop and gives you the thrust to raise your legs. Bring your heels close to your buttocks.
Note: Beginners should practice this asana against a wall.
5. Press your elbows to the floor and lift your shoulders up, away from the floor. Exhale, and gently swing your knees upward in a smooth arc, until both your thighs are parallel to the floor. In this position, the entire upper body, from the head to the waist and hips, should be perpendicular to the floor. Do not move your elbows until you come out of the final pose.
6. Continue to move the knees upward, slowly bringing them to point to the ceiling. Keep the heels close to the buttocks. Focus on your balance and do not allow your torso to move during this action. Steps 5,6, and 7 constitute a gentle, continuous movement, as you raise your legs toward the ceiling.
7. Once your knees are pointing to the ceiling, hold the pose for a few breaths. Make sure that the spine is straight. Tighten the buttocks. Ensure that your thighs are positioned perpendicular to the floor, your lower legs bent toward your back. Check that your shoulders do not tilt. Pause and get used to the feel of the position.
8. Straighten your knees to bring the lower legs in line with the thighs. So that your body forms a vertical line. Point your toes toward the ceiling. Tighten both knees, as in Tadasana, and keep your thighs. Knees, and toes together. The entire body should be balanced on the crown, not on the forearms and hands, which should simply support the balance in the pose. Stretch your upper arms, torso, and waist upward, along the legs to the toes, ensuring that your torso does not tilt. Steadiness and a constant lift of the shoulders ensure stability in the posture. Hold the pose for 5 minutes, breathing evenly.
Caution
Do not practice this asana if you have high blood pressure, cervical spondylosis, a cardiac condition, a backache, headache, or migraine. Do not start your yoga session with this pose if you have low blood pressure. Perform the asana only once in a session and do not repeat it if you fall-your body should not be overworked. Do not practice this asana during menstruation.
Parsva Virasana (side twist in the hero pose)
Props- A blanket and a wooden block. Sitting on the blanket reduces pressure on the knees and on the ankle joints. The wooden block, positioned on its long side and placed under your hand, makes it easier for you to rotate your torso and to lift and stretch your spine more effectively.
1. Kneel on the mat with your knees close together. Gradually separate your feet. Fold the blanket, and place it between your feet. Lower your buttocks onto the blanket, making sure that you do not sit on your feet. Place the block on the floor, behind your buttocks and parallel to them. Place your palms on your knees. Sit with your head, neck, and back erect. Pause for 30-60 seconds.
2. Exhale, then place your left hand on the outer side of your right thigh. Rest your right hand on your right hip. The inner sides of your calves should touch the outer sides of your thighs. Push the inner sides of both heels against your hips. Stretch your ankles and then your feet, from the toes to the heels. Feel the energy flow through your feet.
3. Open your chest and focus on your kidneys. Imagine you are pulling them into your body. Keep your spine upright by pulling up the inner portion of your buttocks. Press your knees firmly down to the floor and stretch your torso up further. Exhale, then turn your chest and abdomen to the right. Move your right shoulder blade into your body and increase the pressure of your left palm against the right thigh.
4. Turn, lifting your ribs and waist away from your hips, and twisting your torso further to the right. Straighten your left arm and pull your left shoulder blade in toward your spine. Place your right palm on the block and press it down firmly. Ensure that your buttocks rest on the folded blanket. Exhale, and twist your torso even further to the right. If you feel discomfort while rotating your torso, place a rolled towel under each ankle and sit on a wooden block. Hold the pose for 20-30 seconds. With practice, increase the duration to 1 minute. Repeat the pose on the other side.
Caution
Avoid this asana if you have blocked arteries, cardiac disorders, high or low blood pressure, migraine, headaches, severe eye strain, bronchitis, a cold and congestion in the chest, or diarrhea. Do not practice during menstruation, or if you are prone to depression, extreme fatigue, or insomnia.
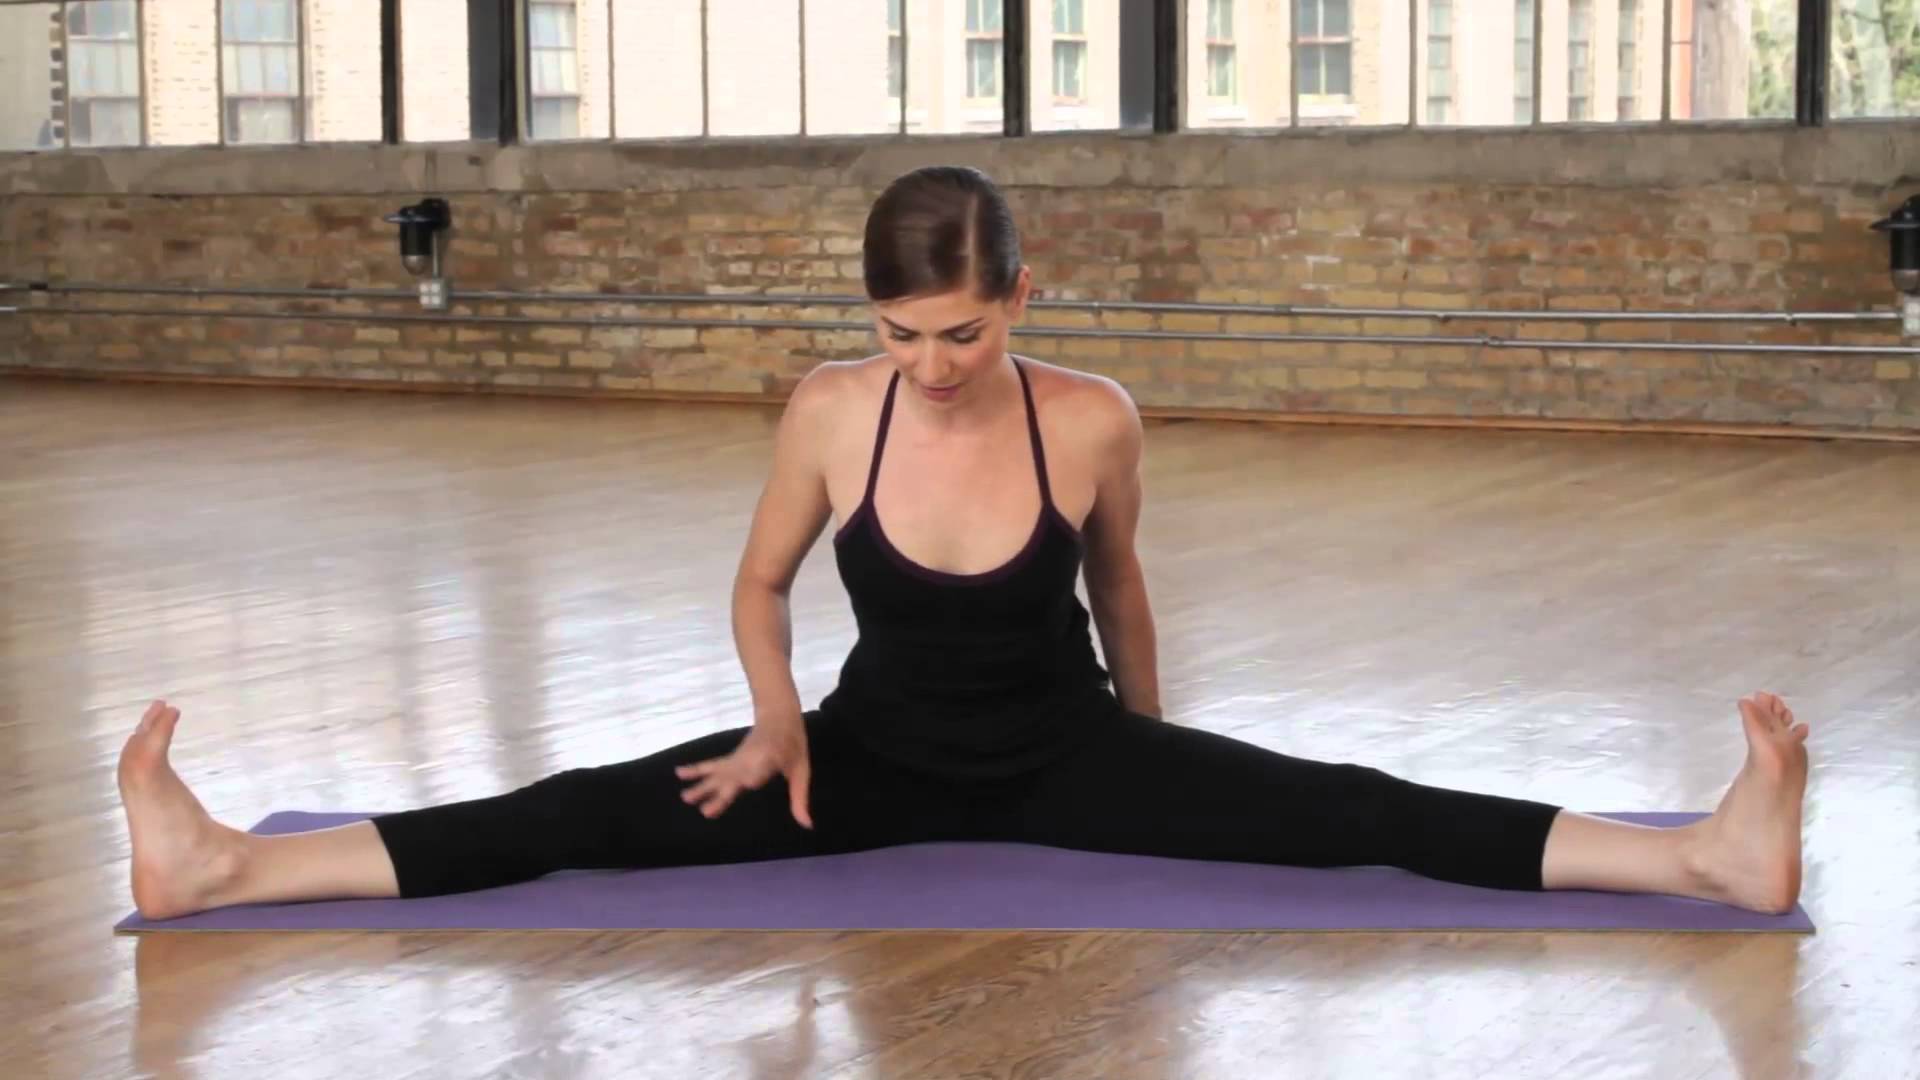
Upavista Konasana (Seated wide-angle pose)
Props- A wall supports the back and eases breathing.
1. Sit against a wall. Then sit in Dandasana with your shoulders and back touching the wall. Keep your back erect. Sit on your buttock bones. Place your palms on the floor, beside your hips, fingers pointing forward. Look straight ahead.
2. Press your palms down on the floor to push your torso upward. Exhale, and spread your legs as far apart as possible. Use your hands, one by one, to help you to push your legs even further out to the sides.
3. Move your hands behind your buttocks, and place both palms on the floor. Press your heels and thighs down on the floor. Lift your waist and the sides of your torso. Rotate your thighs to the front so that the kneecaps face the ceiling. Shift your weight from the buttocks to the pelvic bone. Stretch each leg from thigh to heel. Hold the pose for 30-40 seconds.
Caution
If you have asthma, you must practice this asana sitting on a folded blanket. The wall and blanket lift and open the chest, allowing for easy breathing. Avoid practicing this asana during menstruation.
Supta Baddhakonasana (Reclining fixed angle pose)
Props- A bolster, a blanket, a yoga belt, and two wooden blocks. The bolster supports the back and lifts the chest. The blanket supports the head, alleviating stress and heaviness in the head and neck. The belt helps maintain the angle of the legs easily and holds the feet together. The wooden blocks support the thighs, reducing strain in the groin.
1. Sit in Dandasana. Place a bolster behind you, its short end against your buttocks, and place a folded blanket on its far end. Place 2 wooden blocks on their broad sides on either side of your hips. Bend your knees, and join the soles of your feet together. Draw your heels toward your groin. Buckle the belt and loop it over your shoulders.
2. Bring the belt down to below your waist. Pass it under both feet to stretch it over your ankles and the insides of the thighs. Move your feet closer to your groin. The belt should feel neither too tight nor too slack, so adjust the buckle accordingly. Make sure that the end of the bolster touches your buttocks. Position a block under each thigh.
3. Place your elbows on the floor, and lower your head and back onto the bolster. Make sure that the bolster comfortably supports the length of your back and your head. Your spine should be on the centre of the bolster. Stretch your arms out to the sides, with the palms facing the ceiling. Relax, and extend your groin out to the sides. Feel the expansion of the pelvis, and the release of tension in your ankles and knees. Initially, stay in the pose for 1 minute. With practice, increase the duration to 5-10 minutes.
Caution
Do not practice this asana if you have lower backache or poor bladder control. If you feel any strain while getting into the pose, use two bolsters instead of one. If you feel strain in the region of the groin, place a folded towel or blanket on both blocks placed below the knees.
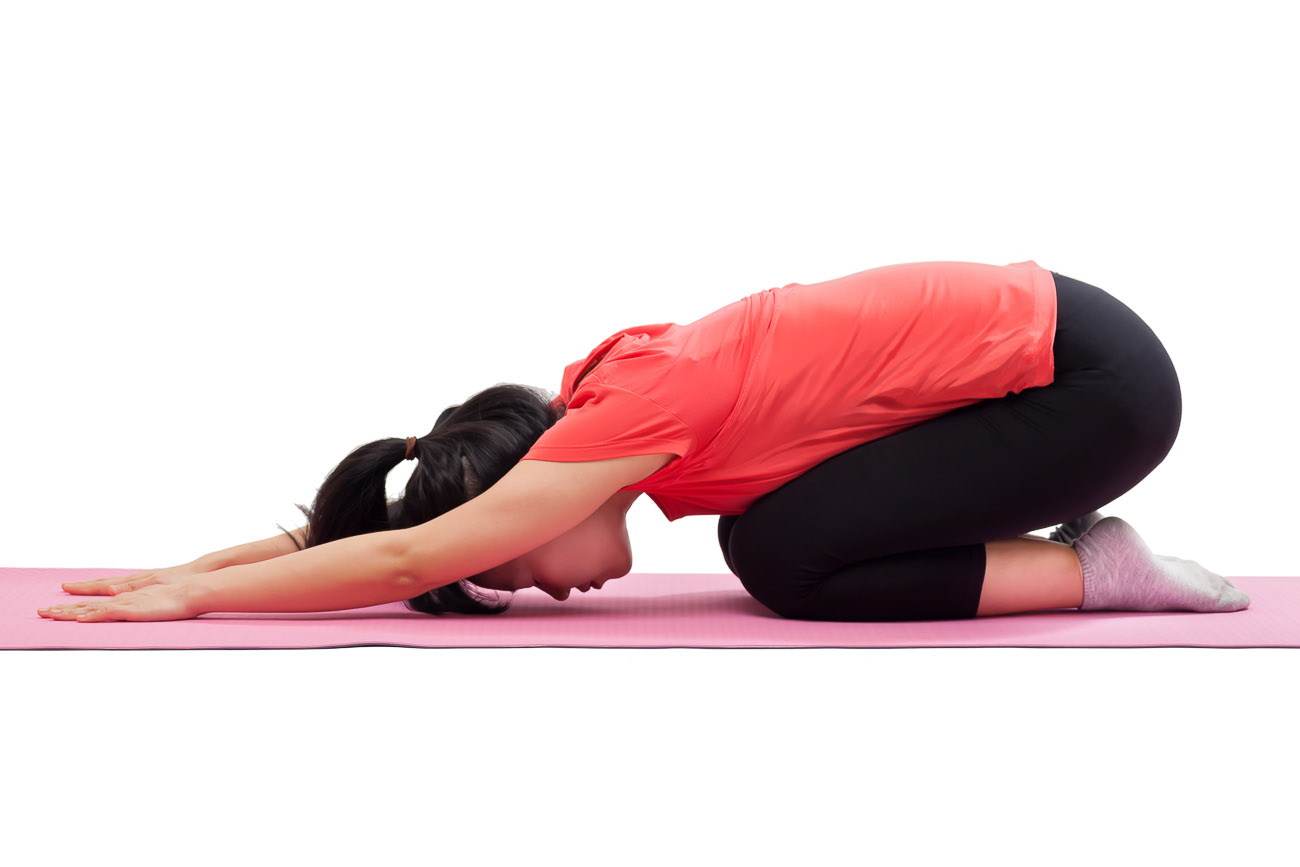
Adhomukha Virasana (Downward-facing hero pose)
This asana is a variation of the classic pose, Virasana.
Props- A bolster and two blankets.. The bolster supports the head and eases stiffness in the back. A blanket supports the chest, while the second blanket under the thighs relieves painful ankles. If you have migraine, or a stress-related headache, wrap a crepe bandage around your eyes.
1. Place a bolster on the floor and put a rolled blanket on it. Kneel with the bolster between your knees. Place the second blanket across your calves and heels. Lower your buttocks onto the blanket. Place both palms on your knees, your feet close together. Imagine you are pulling your kidneys into your body. Pause for 30 seconds.
2. Move the bolster toward you. The front end should be in between your knees. Draw the bolster closer to your body so that it is just below your abdomen. Position the rolled blanket on the bolster so that you can rest your face on it. Now exhale, and move your torso forward. Stretch your arms out fully and place your hands on the floor, on either side of the far end of the bolster.
3. Lower your chest to the bolster stretch your arms forward, extend the nape of your neck, and rest your forehead and face on the blanket. Push your thighs down, and lower your buttocks toward the floor. Keep your abdomen soft. Open your armpits and extend your sternum. Push your chest forward, broadening your ribs. In order to relax your body, increase the forward stretch of your torso and spine on the bolster. Make sure your buttocks rest on the other blanket. Stay in the pose for 30-60 seconds.
VARIATION 1 Two Bolsters
Props- Two bolster and two blankets. The bolsters help those with stiff backs to hold the pose easily. The added height makes it easier to lower the chest.
To get into the pose, place 2 bolsters in front of you and follow step 1 of the main asana. Now move the bolsters toward you. The front end of the lower bolster should be between your knees. Draw the 2 bolsters closer to your body, so that the end of the top bolster touches your abdomen. Place the rolled blanket on the far edge of the top bolster. Now follow steps 2 and 3 of the main asana.
Caution
Do not practice this asana if you have osteoarthritis of the knees, breathlessness, bronchitis, diarrhoea, or if you are incontinent. If you have a migraine or a stress-related headache, wrap a crepe bandage round your eyes and forehead.
Supta Virasana (Reclining hero pose)
This asana is less strenuous version of the classic pose. Practice the asana at the beginning of your yoga session, as it calms a restless and agitated mind, and induces the right mood for your practice. The pose reduces fatigue and stimulates the entire body. The chest expansion in the asana is particularly beneficial for the heart.
Props- A bolster and a rolled blanket.. The bolster helps people with stiff backs to practice easily. It helps to prevent the knees from lifting off the floor. It also helps to maintain the lift of the chest and the stretch of the torso. The folded blanket under the head prevents eye strain, and ensures that the head and neck do not tilt to one side.
1. Kneel in Virasana and place a bolster behind you, the short end touching your buttocks. Place a rolled blanket on the far end. Make sure that the inner sides of your feet touch your hips. Keep your back straight. Place your fingers on the floor beside your toes.
2. Press your palms on the floor. Bend both elbows, and lean back toward the bolster. Place your elbows and forearms, one at a time, on the floor. Gradually lower your back onto the bolster. To avoid strain in the pelvic area or the thighs, ensure that your knees remain firmly on the floor.
3. Once you lower your back onto the bolster, rest the back of your head on the rolled blanket. Keep your chest fully expanded. Press your shoulder blades down on the bolster to lift your chest. Extend your toes and ankles toward the bolster. Push your feet closer to your hips with your hands. Extend the pelvis, and press your thighs close together.
4. Move your arms out to the sides, with the palms facing upward. Extend your neck, but keep your throat relaxed. Drop your eyelids down gently. Experience the relaxation of the thighs and the abdomen, and the lift of the chest. Feel the continuous stretch from the cervical spine to the tailbone. Initially, stay in the pose for 1 minute. With practice, increase the duration to 5-10 minutes.
Caution
Do not practice this asana if you have lower backache. If you have lower backache. If you have angina or partially blocked arteries, or are recovering from bypass surgery, only practice the pose under expert supervision.
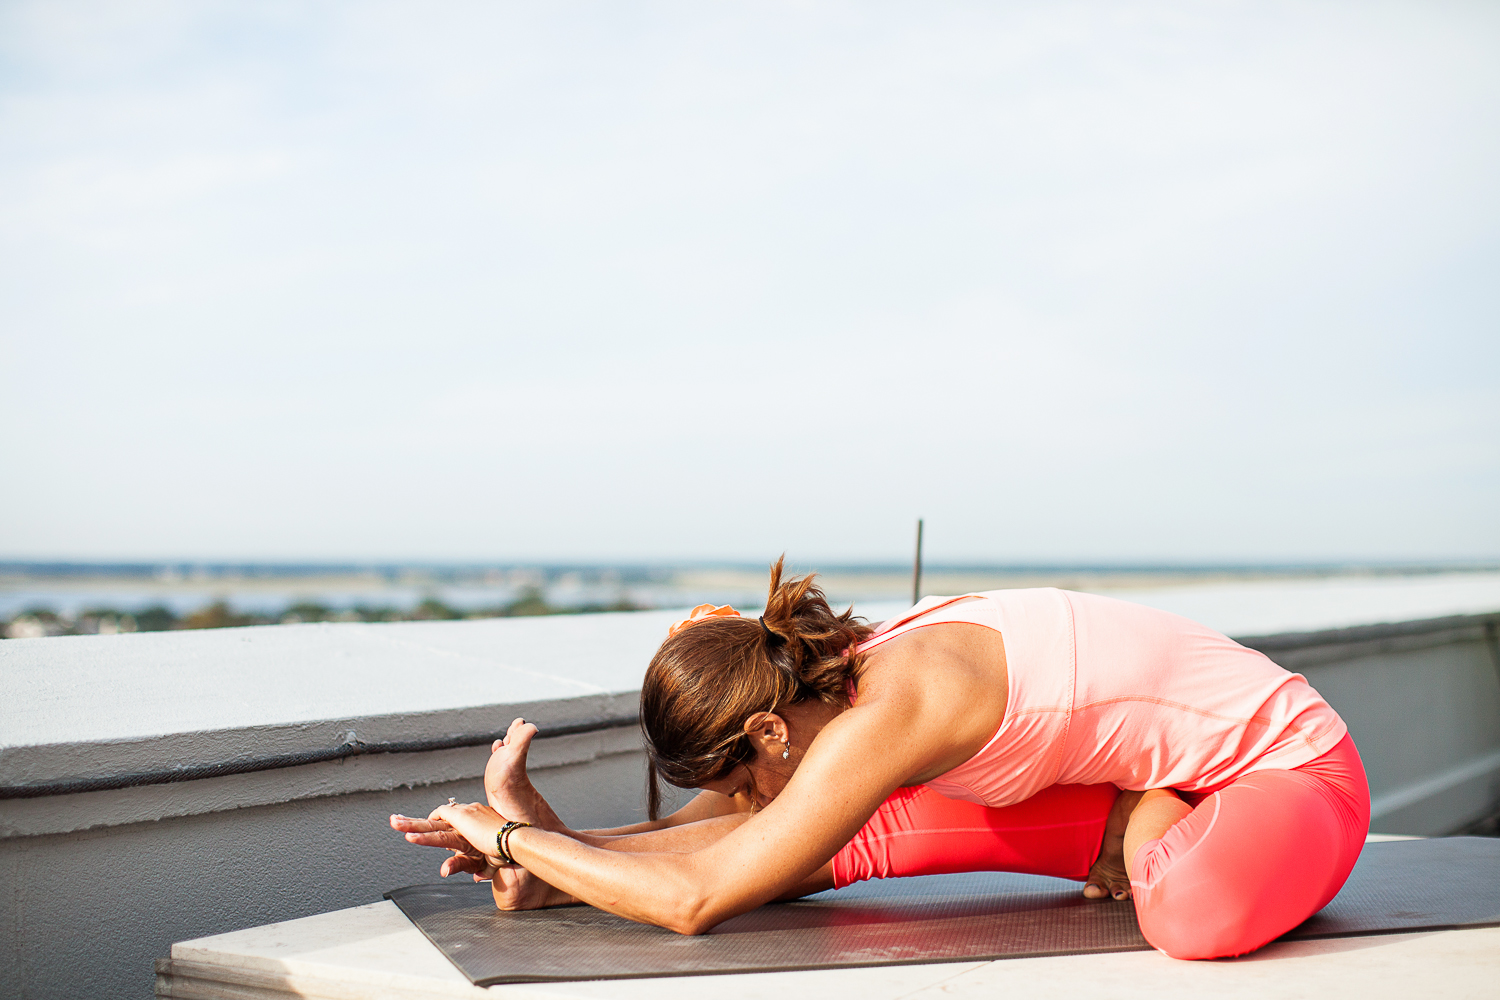
Janu Sirsasana (Head-on-knee pose)
This asana calms the brain and the sympathetic nervous system. The mind detaches itself from the senses and feelings of restlessness and irritability are soothed. This adapted version of the classic pose is supported by props. It rests the heart and activates the anahata or “heart” charka, helping to treat depression and alleviate insomnia.
Props- A bolster, a blanket, and a low, open stool. The bolster and blanket support the head and help those with stiff backs to bend forward easily. The low, open stool facilitates the arm extension from the shoulders to the fingers. It also relaxes and stretches the back of the head and neck creating a traction-like extension of the spine.
1. Place a low stool on the floor. Sit in Dandasana with your feet through it. Sit on your buttock bones. Press your palms to the floor beside your hips and straighten your back. Bend your left leg and bring the heel to your groin. Your toes should touch your right thigh and your legs should be at an obtuse angle. Push the bent knee as far back as you can. Keep your right leg absolutely straight. Place the bolster across your right calf, and place a folded blanket on top of it for added height.
2. Exhale, and bend forward from the base of your spine, not from the shoulder blades. Stretch your arms over the bolster and rest your palms on the stool. Keep your left knee pressed to the floor.
3. Push your torso forward and hold the far edge of the stool. Stretch from the groin to the navel. Do not allow your abdomen to contract as you bend forward. Rest your forehead on the blanket and close your eyes. Exhale slowly to release the tension in your neck and head. Stay in this position for approximately 1 minute. Repeat the pose on the other side.
Caution
Do not practice this asana if you have asthma or bronchitis. Avoid the pose if you have diarrhea as it will aggravate the condition. If your knees are stiff, or if you have osteoarthritis of the knees, practice with a wooden block under the bent knee. If you have a stress-related headache or migraine, practice the asana with a crepe bandage over your eyes.
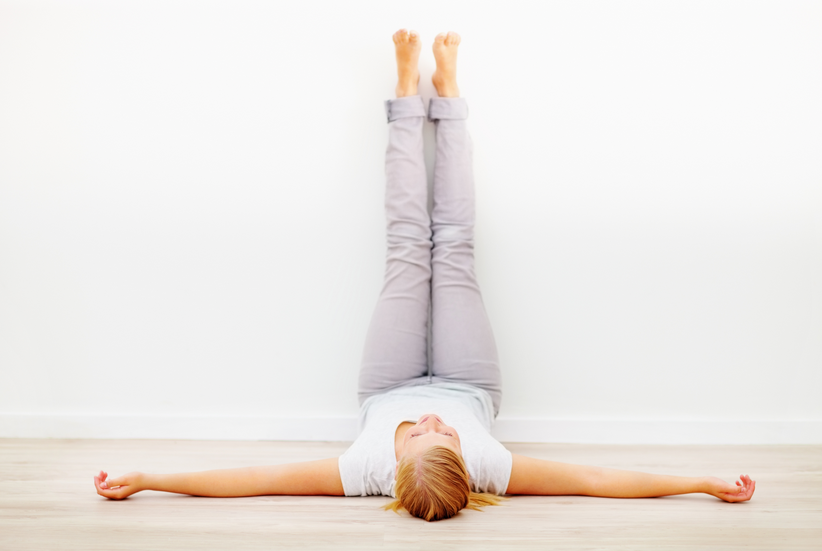
Viparita Karani (Inverted lake pose)
Props- A wall, a wooden block, two bolsters and a blanket. The wall supports the legs. The bolsters support the back and buttocks. A block placed between the wall and the bolsters creates the space to lower the buttocks slightly. The blanket makes the bolsters and block a single unit.
1. Place the block on its long side against a wall. Place the bolsters, one behind the other, parallel to the block. Drape the blanket over all 3 props. Then sit sideways in the middle of the bolsters, and place your fingers flat on the floor behind you.
2. Turn your torso toward the wall, simultaneously lifting your legs, one by one, onto the wall. Keep your knees slightly bent. Support your body on both palms, fingers pointing toward the bolsters. Push both palms down on the floor, and, move your buttocks closer to the wall.
3. Bend your elbows and lower your torso until your shoulders rest on the floor. Straighten your legs fully. If your buttocks have moved away from the wall, bend your knees and place both feet against the wall. Then, press your palms down on the floor, lift your hips, and move the buttocks closer to the wall. Straighten your legs again.
4. Rest your head and neck on the floor. Lift your chest. Spread your arms out to the sides with your palms facing the ceiling. Allow your chest, abdomen, and pelvis to expand and relax. Straighten and stretch your legs. Close your eyes, breathe evenly, and experience the serenity of the pose. Stay in the pose for 3-4 minutes. Gradually increase the duration to 5-8 minutes.
Caution
Do not practice during menstruation, although at other times this asana alleviates menstrual disorders. Make sure that you rest your neck and shoulders firmly on the floor. If necessary, use just one bolster.
Related Links
- Yoga Therapy for Eating Disorder
- Irregular Menstrual Period
- Yoga & Stress
- Yoga is in a position to relieve asthma
- CHAKRAS : The wheels of spinning light
- Yoga for managing symptoms of Menopause
- Top 10 Yoga Exercises to Prevent Lower BackacHE
- Top 10 Lifestyle Modifications to combat migraine
Disclaimer
The Content is not intended to be a substitute for professional medical advice, diagnosis, or treatment. Always seek the advice of your physician or other qualified health provider with any questions you may have regarding a medical condition.